Next: 5. VXLAN & Logical Switches ->
In the previous step of this series of NSX posts, we looked at the NSX Manager and its deployment. In this article, we are going to have a quick look at the NSX Controller architecture at a high level and how to deploy them.
-
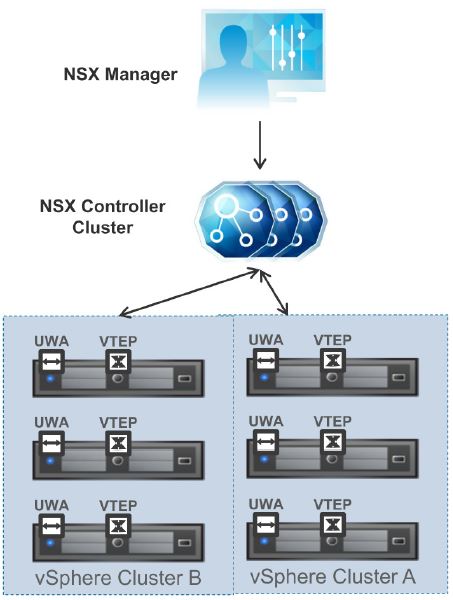
NSX Controller Architecture – Key points
- They provide
- VXLAN distribution & Distributed Logical Router (DLR) workload handling & providing information to ESXi hosts.
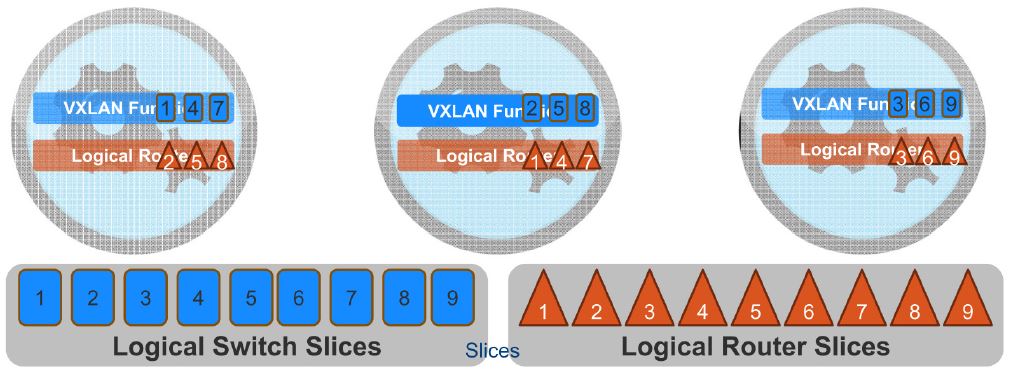
- Workload distribution through slicing dynamically amongst all controllers
- Removal of multicast
- ARP broadcast traffic suppression in VXLAN networks
- They store
- ARP Table: VM ARP requests for a MAC are intercepted by the hosts and sent to NSX controllers. If the NSX controllers has the ARP, it’s returned to the host that then replies to the VM locally resulting in no ARP broadcast.
- VTEP table
- MAC table
- Routing table: Routing tables are obtained from the DRL control VM
- Cluster of 3 NSX controllers is always recommended to avoid a split brain scenario
- 4 VCU & 4GB RAM per each controller
- Should be deployed on the vCenter linked to NSX manager (meaning, on the compute or service & edge cluster, NOT the management cluster)
- User interaction with NSX controllers is through CLI
- Control plane communication is secured by SSL certificates
- They provide
-
NSX Manager interaction with NSX Controller
- NSX mgr and vCenter systems are linked 1:1
- Install UWA, and few kernel modules (VXLAN, DLR VIB, DFW VIB) on the ESXi servers of the clusters managed by the linked vCenter server during the host preparation stage
- UWA=User World Agent
- Run as a service daemon called netcpa (/etc/init.d/netcpad status)
- Mediates between NSX controller and hypervisor kernel module communication except for DFW
- Maintains logs at /var/log/netcpa.log on the ESXi host of the compute & edge clusters
- Kernel modules
- UWA=User World Agent
- For each NSX role (such as VXLAN, Logical routers….etc) a master controller is required
- Uses slicing as a way to divide NSX controller workload in to different slices and allocate to each controller (controlled by the master)
NSX Controller Deployment
Deploying the NSX controllers (3 recommended as stated above) is fairly straight forward
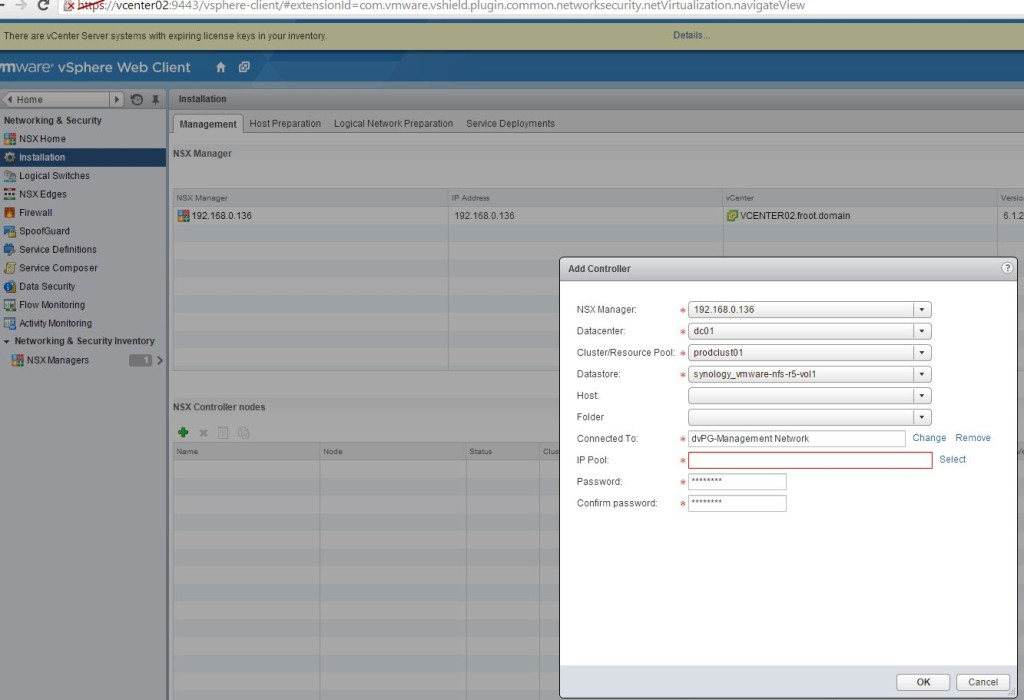
- Launch the vSphere Web client (for the compute or edge cluster, NOT the management cluster vCenter server) and select Networking and Security – note that you need to have logged in to vSphere web client as a NSX enterprise admin user (how to set up rights was covered in the previous post of this series)
- Select Installation from the left pane
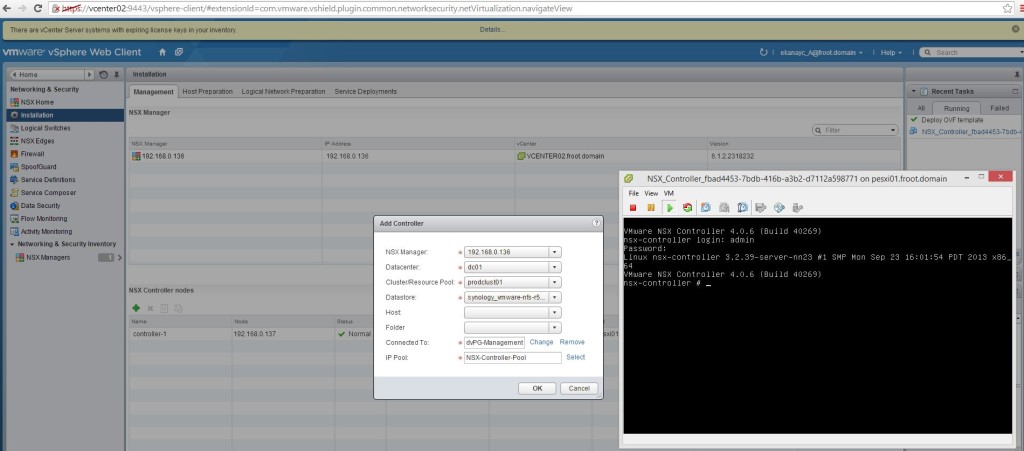
- At the bottom, under NSX controller nodes section, select the plus sign to add the first NSX controller node and provide all the information requested in the next screen. Note the below
- Once complete, click OK and you can see the first controller is being deployed

- Once deployed, you can putty in to the CLI using the IP (first IP of the pool you specified above) and verify the control cluster status
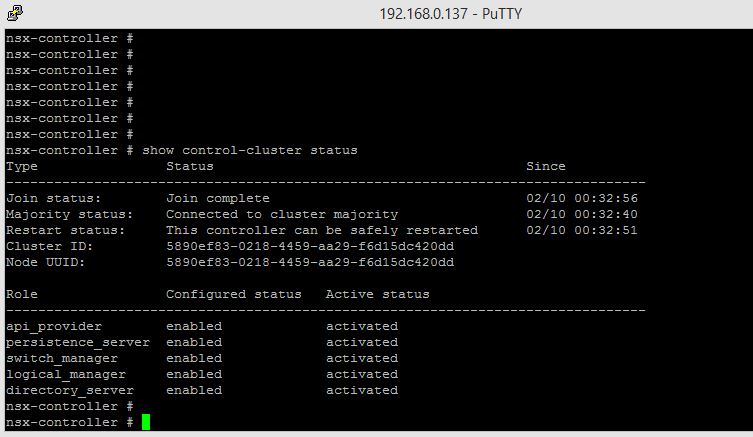
- Now, follow the same steps and deploy the 2nd and 3rd NSX Controller nodes too and verify the CLI access

That’s it, you now have your NSX controller clusters fully deployed and configured.
In the next post of the series, we will look at Logical switches and VXLAN overlays..
Next: VXLAN & Logical Switches ->
Cheers
Chan

