
So now we have a fully functioning vRA 6.2.1 deployment, fully integrated to the on-premise vCenter instance, the vRO appliance for workflow orchestration and NSx for network orchestration (via vRO). Now lets look at how to set up a cloud endpoint so that you (or the users) can request VM’s to be provisioned on the cloud rather than their local vSphere cluster. We are looking at adding VMware’s own vCloud Air platform in this article (if I managed to gain access to an Amazon AWS instance, I’d publish a future post on that too as each cloud platform integration is different to one another.
VMware vCloud Air (formally known as vCHS) is VMware’s own managed and operated cloud platform, that runs on the same vSphere technology as your on-premise environment. They have a vCloud Director instance in front, which manages the multi tenancy aspect of a collection of vSphere clusters which you can either buy a subscription as an on demand basis (similar to AWS) or monthly / annual subscription basis (with no usage charges which is real handy). vCloud Air has been around a while now and is quite popular given that you don’t have to change the architecture of your on-premise applications or servers (VMs) that they are installed on to move them to the cloud (which is the case with both Amazon and Azure and could be painful and expensive). With vCloud Air, you just move the whole VM as is with the application already deployed on it and it will work fine on vCloud Air platform just like it did on your own vSphere cluster (You also have the option to do a “Stretched deployment” which is a way of moving the VM to the cloud but establishing a Layer 2 network between your vSphere cluster and vCloud platform over a VPN so no IP’s need changing which is awesome).
Just like AWS, vCloud Air (as well as any other 3rd party cloud provider who runs their cloud platform behind vCloud Director basically) can be integrated to your on-premise vRA instance as an endpoint. Imaging that you have a number of developers who, as a part of an application development cycle, would require multiple copies of your production environment (System Integration Testing, User Acceptance Testing…etc.) can easily be offloaded on to a vCloud Air platform without having to buy expensive kit locally to host multiple copies of your prod environment (we are talking additional SAN, Compute, Hypervisor & Networking costs here). Lets also imaging that they want to be able to use vRA so that they can self provision clones / copies of the production environment using pre-defined blueprints defined & published on the vRA IaaS catalog portal? You can quite easily make this happen and attach a vCloud Air endpoint, create a resource reservation on that endpoint and associate that with the business group that the developers belong to and create vCloud (vApp) type blueprints on vRA so that everytime a developer want to create a copy of that SQL server with 2 x App and 2 x Web servers to test a new application, they go to the vRA catalog, request those be provisioned and the servers will automatically be created on the mapped vCloud Air platform. (You can create a single Multi-Machine blueprint to group all of those individual server blueprints too which we’ll cover later)
Ok, enough of what we can do with vRA and vCloud Air and how cool that is… Lets look at what it takes to integrate the vCloud Air subscription you have to vRA and create and publish a vCloud blueprint & provision a VM on cloud that way.
Given below are the steps involved
- Create a vCloud Air (vCloud Director) endpoint
- Note: If you can remember what we covered in a previous post here, Infrastructure Admins usually create the endpoints within vRA. So login to the vRA portal using as the infrastructure admin (if you are using the default tenant, the URL is “https://<FQDN of the vRA Appliance>/shell-ui-app”. If you have a tenant specified, it’ll be https://<FQDN of the vRA Appliance>/shell-ui-app/org/<TenantName>”. I’m using a tenant called Tenant1 in my example within vRA)
- Go to Infrastructure->Endpoints->Credentials and set up credentials to access the vCloud Air endpoint – this is the same username & password you use to login to the vCloud Air online portal that you should have been given / created during the vCloud Air onboarding process (first thing that happens once you’ve signed up)

- Go to Infrastructure->Endpoints-> and create a new vApp (vCloud) type endpoint (this is the same as if you were creating an endpoint to a local vCloud Director instance)
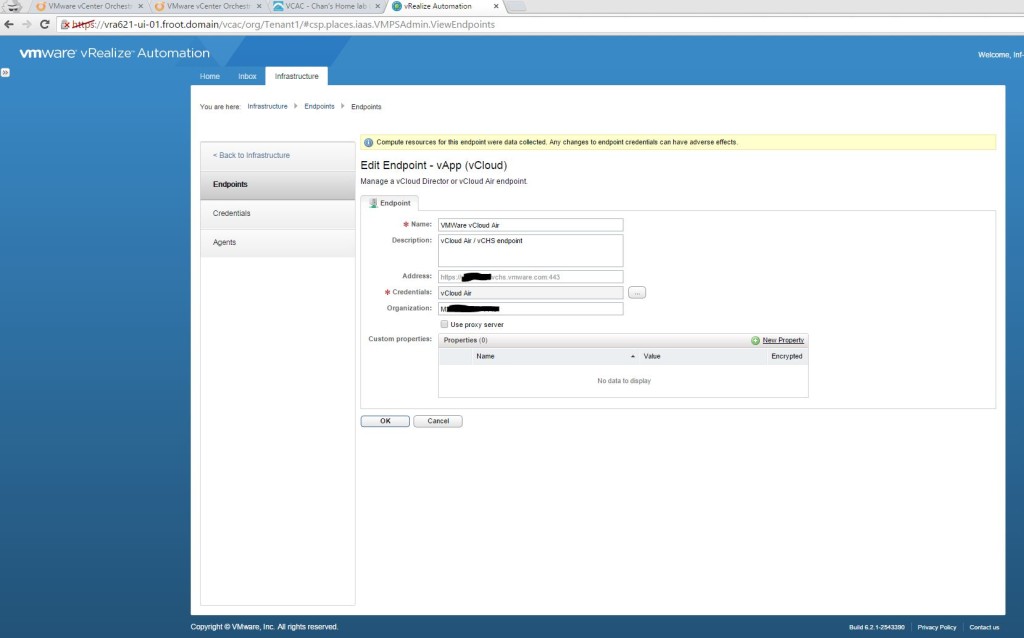
- Once the endpoint is created, hover the mouse over the endpoint name and select the data collection and start the collection. You need to wait for this to complete first.
- Create a new Fabric group (Infrastructure Admin)
- Go to Infrastructure->Groups->Fabric groups and create a new Fabric Group (or you can use an existing fabric group and map the vCloud Air endpoint to it.

- Go to Infrastructure->Groups->Fabric groups and create a new Fabric Group (or you can use an existing fabric group and map the vCloud Air endpoint to it.
- Create a reservation for the vCloud Air endpoint (Fabric Admin)
- Note: Creating a reservation maps a logical portion of the vCloud Air endpoint to the business groups you have. I’m using an existing business group but if you need to create a new business group, do that first and select that business group during the reservation creation here.
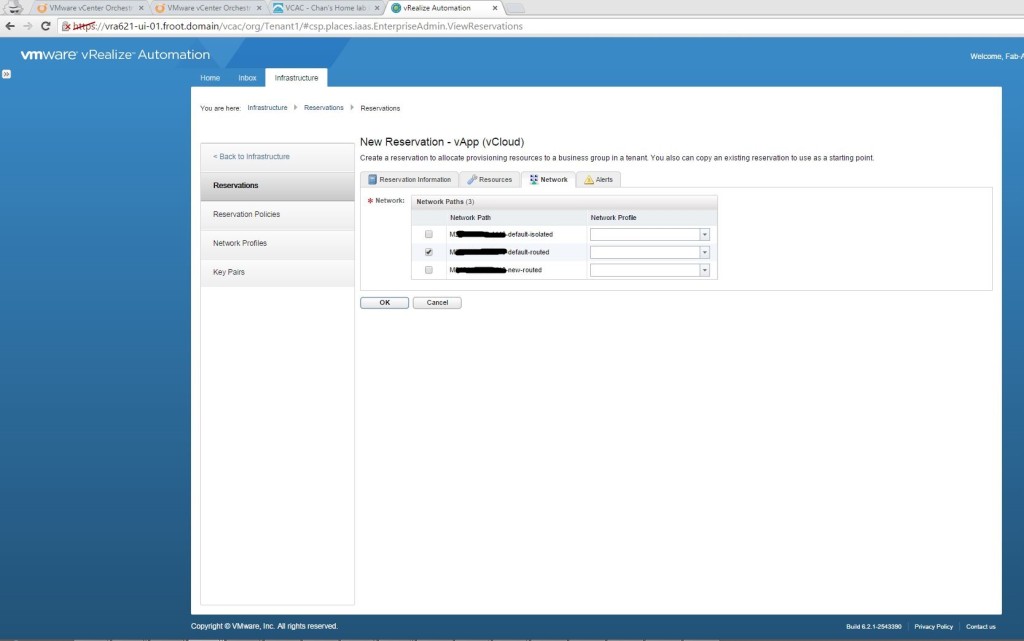
- Go to Infrastructure->Reservation and create a new cloud reservation of type vApp (vCloud), as Fabric Admin user, selecting the mapped endpoint and the business group

- Go to the Resources tab and select a memory portion and storage portion to be used for this reservation

- Go to the Network tab and select the network you want to map to the reservation. Networks available here depends on the networks you’ve created within your vCloud Air portal. By default, you’ll have 2 networks, the default-isolated (private network) and default-routed (network with external connectivity) – Note here that at some point in the future, VMware will roll out NSX on the vCloud Air platform and once that’s complete, you’d also be able to create the logical networking via the same vRA / vCO blueprint too. This is going to be really cool and I don’t think any other public cloud vendor will have this capability for a while. If you have a network profile with static IP’s configured, select that network profile here which will allocate an IP to the VM from the network profile (which we covered in a previous post of the series). I’m not using a one here.
- Create & Publish vApp Component Blueprint (Tenant Admin)
- Note: When creating vCloud Air blueprints, its a 2 step process whereby you need to create a vApp Component blueprint first for each VM and then create a higher level master (group) vApp blueprint which will contain 1 or more of the lower level vApp Component blueprints. This is because on vCD (vCloud Director), every VM is placed inside a vApp so you need to create both through the vRA. But when you ultimately create the service & publish it with entitlements to the users, you only need to publish the master vApp blueprint.
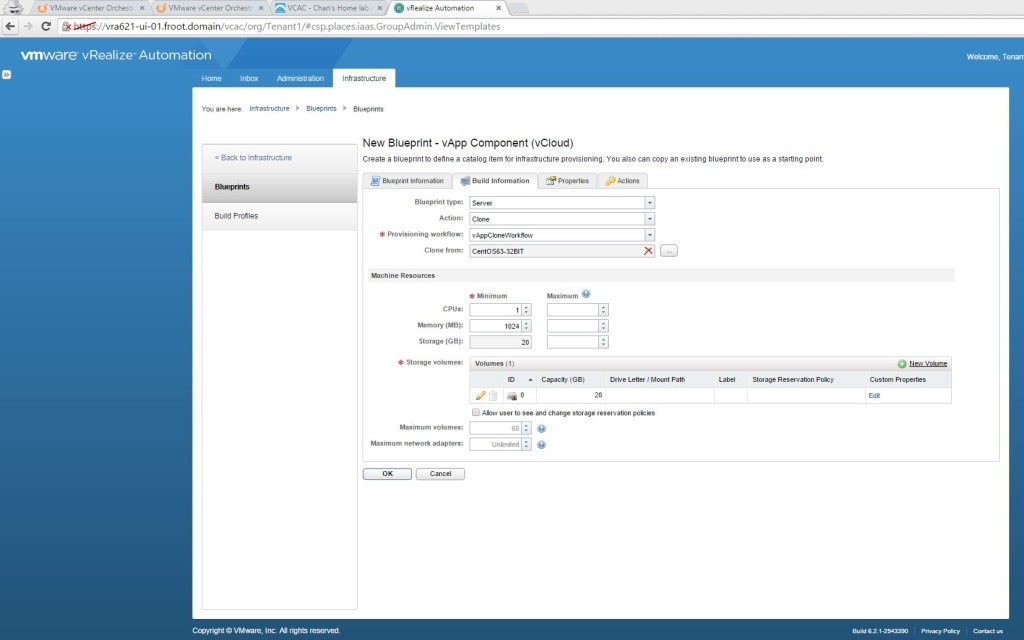
- Login as tenant admin & go to Infrastructure->Blueprints and create a new cloud blueprint of type vApp Component (vCloud). Provide a name and select the Machine prefix

- Go to build information tab and select the cloning action and select the template (you can select from a list of VM templates available within vCloud Air here provided that the data collection from the endpoint has been successful. You have a default set of global templates VMware provides (include CentOS, Ubuntu, Major Windows flavours with SQL) or if you’ve migrated some of your local templates you’ve created, that is specific to your environment (i.e. a Standard server build template from your local vSphere cluster which you can do using vCloud Connector to the vCloud Air portal), they too would appear here. And select the machine resources appropriate.
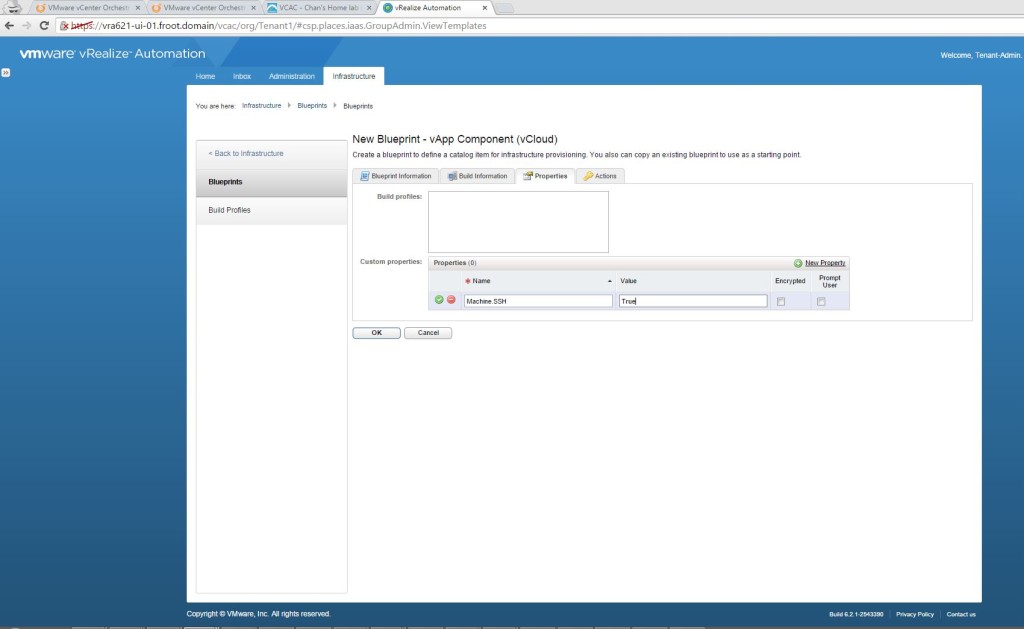
- Add any custom properties in the next tab and click OK.
- Once the vApp Component blueprint is created, don’t forget to publish it (hover the mouse over the blueprint and click publish).
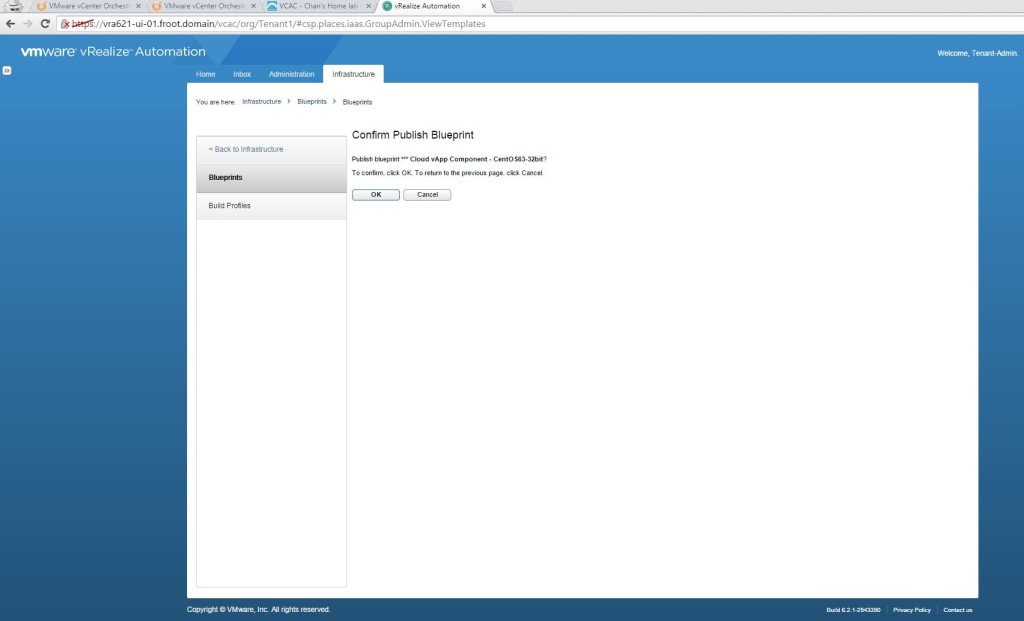
- Create & Publish a vApp Blueprint (Tenant Admin)
- Note: now its the time to create the master vApp blueprint (which, as I explained above, is going to include the component blueprint and which will be published to users)
- Create a new cloud blueprint of type vApp (vCloud) and provide the information. Select the same reservation as used for the vApp component blueprint.

- Go to the build information tab and select the clone action, and the clone from template should be the same as what you’ve chosen for the component blueprint. Then, nder the components, select the previously created component blueprint to link the child to the parent.

- Once completed, don’t forget to publish this one too.

- Create a Service to list the blueprint within the catalog (Tenant Admin)
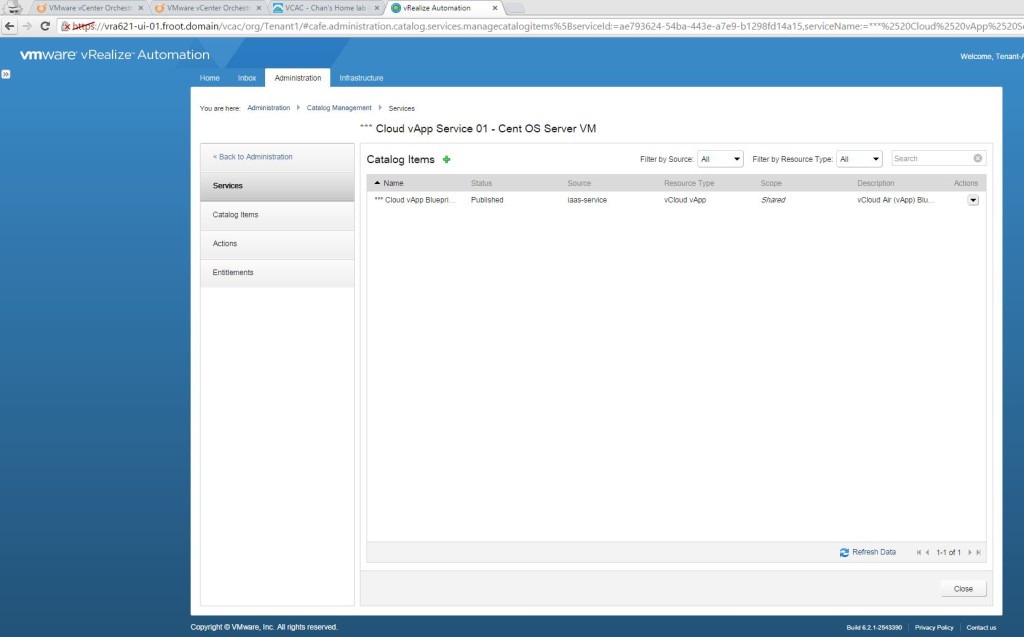
- Go to Administration->Catalog Management->Services and add a service and provide all the information required including an icon, owner & support group details.

- Select the service create and click on manage Catalog Items and add the vApp blueprint. Make sure you don’t add the vApp component blueprint here.
- Go to Administration->Catalog Management->Services and add a service and provide all the information required including an icon, owner & support group details.
- Create Entitlements (Tenant Admin)
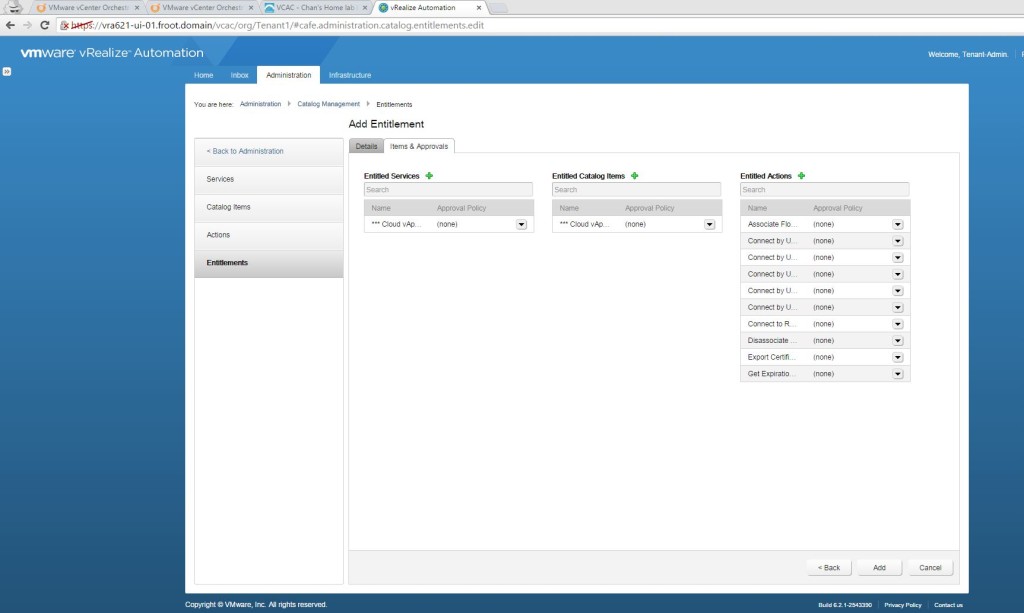
- Go to Entitlements and add a new entitlement and set the status to active. Also select the users / groups (from the business group) that this blueprint is entitled to.

- Go to the Items & Approvals tab and select the created service under entitled services & the same vApp blueprint under the catalog items and all relevant user actions.
- Go to Entitlements and add a new entitlement and set the status to active. Also select the users / groups (from the business group) that this blueprint is entitled to.


That’s it. You’ve now successfully created a public cloud endpoint within your on-premise vRA, and created and published a VM blueprint that can be used to deploy VM’s on the cloud automatically by your users.
If you now login to the same vRA URL as a valid user who were given the appropriate entitlements above, you’ll see the new blueprint item being available.

If you go ahead and request a VM using this cloud blueprint, the request status would be shown under the requests tab 
If you now look directly at the vCloud Air online management portal, you’ll see the VM is being provisioned automatically. Once its complete, you’ll notice the owners name changes.

Once the VM is successfully provisioned in the cloud, the user will also see the status of that within the on-premise vRA portal which they can either access through vRA (console access) or though the vCloud Air online management portal directly (provided that they have a valid user account to login with – note that this account is separate. 
There you have it. VMware vRA can be a single point of automation and orchestration engine to automate and orchestrate various tasks, machine / VM provisioning on-premise as well as VM provisioning on the cloud. And this shows how vRA can be a key part of what I believe to be the true hybrid cloud infrastructure where you can place workloads on-premise or off premise based on your needs.
If your on-premise vRO is integrated with vCloud Air also, you can create further customisation workflows within vRO and publish them on vRA as an advanced service blueprint too (I will cover that in a future post)
Cheers
Chan