Now the fun part of this series of articles begins where we look at truly leveraging the extensibility capabilities.
First of all, its important to understand what this word “extensibility” means in the context of vRA.
Extensibility
Machine Extensibility usually means the ability to customise the default IaaS workflows available within vRA through 2 key methods
- Old way: Using commandline tools (cloudutil) and vCAC Designer
- New (recommended) way: Using the built in vRO workflows
This customisation lets you achieve various tasks during various stages of a machine life cycle that you cannot achieve using the default, built in IaaS workflows available within the vRA database. You do this by injecting custom logic to the built in IaaS workflows, to be executed at various stages of the machine lifecycle. Lets take a look at the details of the components involved in little more detail.
vRA database has 10, built in IaaS workflows that define the logic of how and what happens during an IaaS machine life cycle. These workflows are fully customisable. Out of these 10, 4 are for menu extensibility while the other 6 are state change workflows, , known as workflow stubs which define the actions that take place when a vRA machine reaches its various stages of its lifecycle. Given below is a list of those 10 default workflows

The 6 state change workflows (a.k.a. workflow stubs) directly correspond to the 6 stages a machine can go through, which are as follows
- State=BuildingMachine, corresponding workflow name = WFStubBuildingMachine
- State=RegisterMachine, corresponding workflow name = WFStubMachineRegistered
- State=MachineProvisioned, corresponding workflow name = WFStubMachineProvisioned
- State=Expired, corresponding workflow name = WFStubMachineExpired
- State=UnprovisionMachine, corresponding workflow name = WFStubUnprovisionMachine
- State=Disposing, corresponding workflow name = WFStubMachineDisposing
You can customise these workflow stubs so that they can call out a vRO workflow for bi-directional integration with external systems. Usually, the vRO workflow is triggered before the IaaS master workflow enters a specific stage. Given below are the key states of the master workflow, with the customisable states highlighted in yellow.
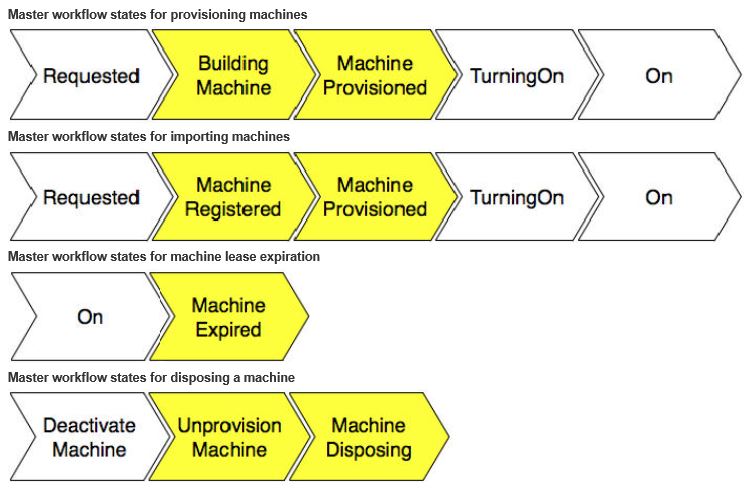
Note that the difference between the machine building and machine provisioning is such that during the BuldinMachine state, VM’s created or the physical server is being built but OS Is not deployed where as the MachineProvisioned state, the OS is already deployed and may be going through customisation / sysprep or any other post deployment tasks. I have not seen these states and what each state mean being clearly documented by VMware anywhere unfortunately. Closest I’ve seen is this article at Dailyhypervisor from Sid Smith who was an ex Dynamic Ops employee. I’m quoting the below from his article which explains when the customisation work actually kicks in for 2 of the most common sub states found within the provisioning master workflow state.
- Provisioning state – Order of execution of sub states
- Building Machine – WFStubBuildingMachine workflow can be used to customise. Executes pre-building machine state
- Customise Machine – Things like cpu & memory & disks are adjusted. No need to customise as the default workflow can address most requirements
- Customize OS – Customisation spec applied – Again, not need to customise the default workflow which is good enough
- Customize Guest – Guest agent performs guest level tasks such as disk partitioning, scripts…etc.
- Machine Provisioned – WFStubMachineProvisioned workflow can be used to customise. Executes during pre-machine provisioned state.
Ok, now that we have a little understanding of what the default workflows are and what’s meant by stub workflows, next step is to look at how to customise some of these stub workflows.
As mentioned earlier, the old school way of doing his would have meant we would have had to use a command line tool called cloudutil and a separate installable program called vCAC Designer (downloadable from the vRA server IaaS component page). This is quite a cumbersome process and involve lot of understanding of things inside the IaaS model manager. If you fancy having a go, all the instructions are available here.
What I prefer and will use in the example below is the use of the vRO workflows that are included as a part of the vRA plugin for vRO, to achieve this customization instead (you simply run the workflows on vRO and it will automatically customise the default vRA workflow stubs within the model manager database). The vRO team has kindly made the above tedious task a lot simpler by making a number of vRO workflows that you can use to customise the stub workflows within vRA IaaS model manager DB. Once the stub workflows are customised, you can run another workflow called, “Assign a state change workflow to a Blueprint and its virtual machines” and effectively bind any vRO workflow to a blueprint so that this workflow can be automatically called during any of those customisable machine states. For example, you can create a vRO workflow to create the description of a computer account and use the state change workflow to assign that to a machine provisioning blueprint so that every time a machine is provisioned from that blueprint (assuming that you select the MachineProvisioned state to trigger the workflow), vRA will call the vRO workflow to change the description of the computer account on the AD. Any input parameters to the vRO workflow will be added automatically as custom properties to the blueprint which needs to be manually filled out with values before the blueprint can be published to the users (in the above example of setting the computer account description, you’d have to specify the description string on the blueprint’s custom properties)
The whole process of using vRO state change workflow with vRA at a high level goes something like this
- Install the vRA plugin to vRO – We’ve already covered this in step 9.3.3 under the heading vRO configuration, mentioned in the previous article here.
- Register the vRA server and the IaaS component of the vRA server with vRO – We’ve already covered this in step 10.4.1 & 10.4.2 under the heading vRO configuration, mentioned in the previous article here
- Install vCO customization – You do this by running the “Install vCO customization” workflow found within “Library->vCloud Automation Center->Infrastructure Administration->Extensibility->Installation” folder within vRO – We’ve already covered this in step 10.4.3 under the heading vRO configuration, mentioned in the previous article here
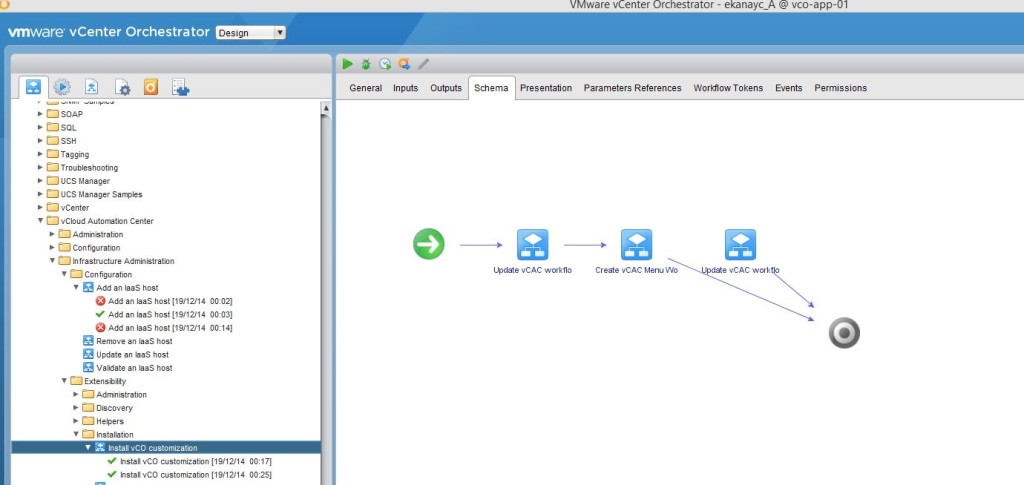
- Note that once this workflow has been run successfully, if you look at the vRA Model manager database using the vCAC designer, you’ll see the default Workflows have been modified (now appear with an increased version number) as shown below

- Assign a state change workflow to a blueprint (effectively bind a vRO workflow to a blueprint and specify which state of the machine lifecycle should trigger the call out to that vRO workflow) – We will look at this in detail below
- Fill out any input parameter values using the custom properties of the blueprint – We will look at this in detail below
This is quite powerful and let you associate any vRO workflow with a blueprint to be called out for numerous extensibility tasks, to be triggered at any of the following machine states
- State=BuildingMachine, using the corresponding workflow name = WFStubBuildingMachine
- State=RegisterMachine, using the corresponding workflow name = WFStubMachineRegistered
- State=MachineProvisioned, using the corresponding workflow name = WFStubMachineProvisioned
- State=Expired, using the corresponding workflow name = WFStubMachineExpired
- State=UnprovisionMachine, using the corresponding workflow name = WFStubUnprovisionMachine
- State=Disposing, using the corresponding workflow name = WFStubMachineDisposing
Lets take a practical example and see how we can assign a state change workflow to a blueprint (in other words, how to bind a vRO workflow to a machine blueprint such that when the machine state changes to a chosen state, that vRO workflow is executed) – Step 4 & 5 mentioned above. As mentioned earlier, lets assume that you have a requirement to add a description to the computer’s AD account, each time a vSphere VM is provisioned from a blueprint and joint to the domain. Given below are the steps involved
- Create a normal vRO workflow to change the computer account name
- Within the vRO client, create a simple workflow to change the description of an AD computer account. – Note that you cannot do this with the built in workflows or action elements and you need to create your own workflow with a scripted task.
- The workflow will have 2 input parameters as follows
- Input Parameter – description (type: string) – Computer account description
- Input Parameter – vCACVM (type: vCAC:VirtualMachine) – vRA VM object
- Attribute – ComputerAD (type: AD:ComputerAD) – Computer AD account

- The scripting part would look like the below
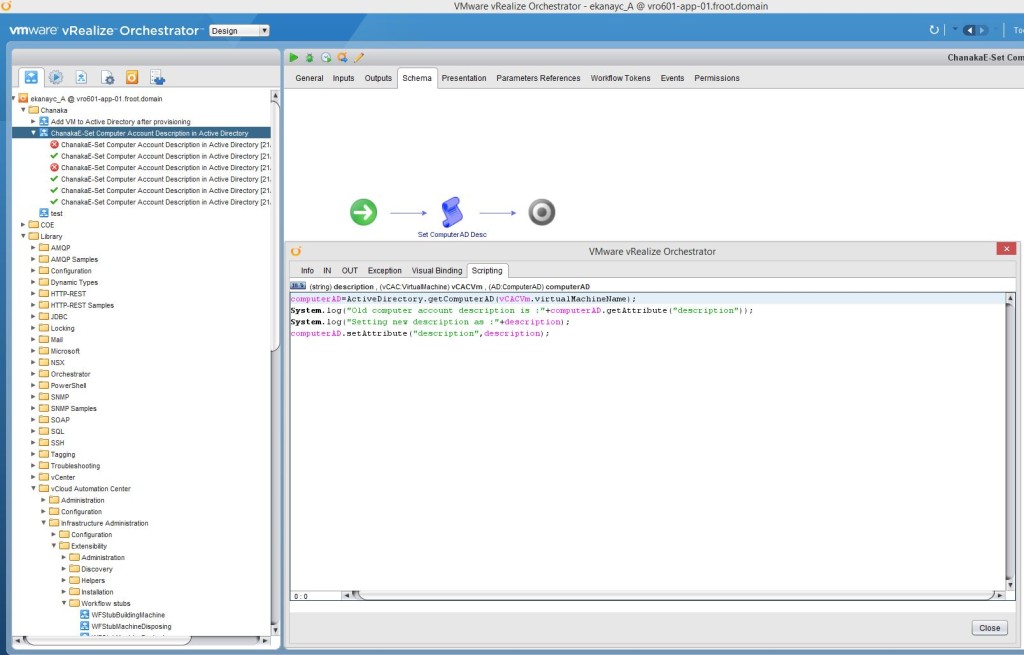
- If its easier, I’ve uploaded the whole workflow which you can just download using below link and import in to your vRO library without having to manually created the workflow from the scratch. ChanakaE-Set Compputer Account Description in AD.workflow (make sure to change the extension from .txt to .workflow once downloaded, before importing to vRO)
- Run this workflow manually against a computer account to ensure the vRO workflow is working as expected.
- Use the built in workflow “Assign a state change workflow to a blueprint and its virtual machines” to bind the above workflow to a vRA blueprint
- Note the pre-reqs below
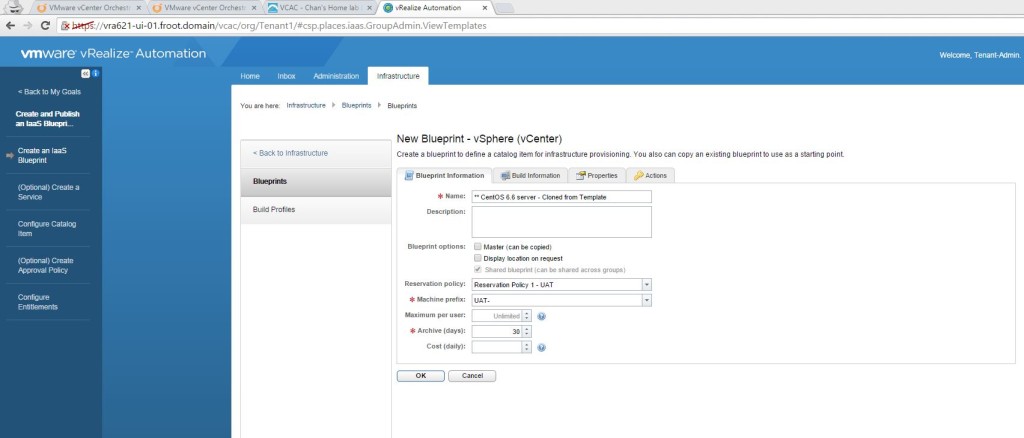
- I’m assuming that you have a VM / physical machine blueprint that creates a Windows VM / Server that is joint to the domain as a part of the provisioning.
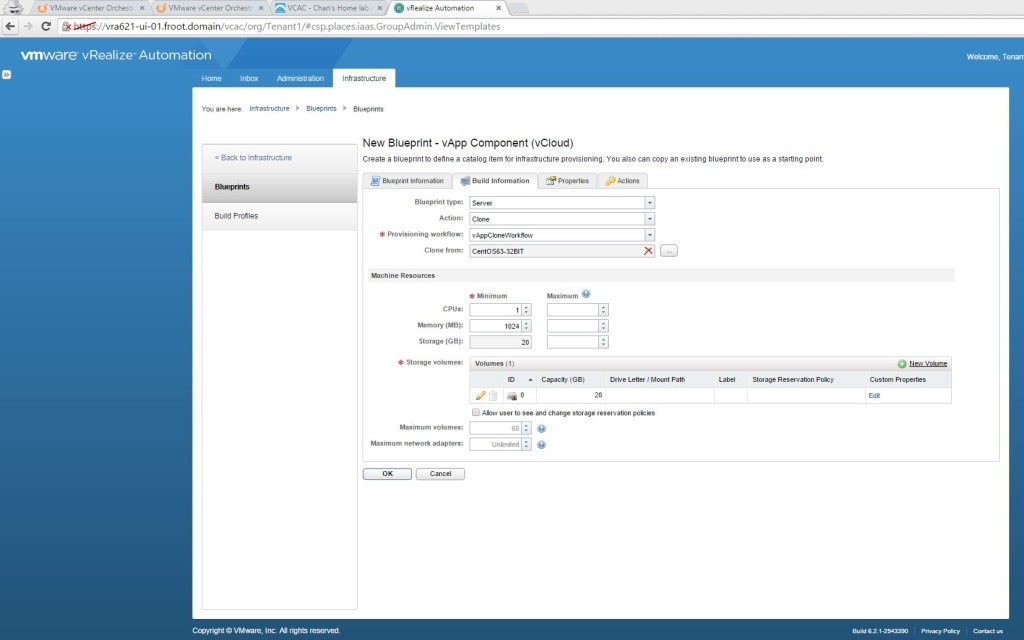
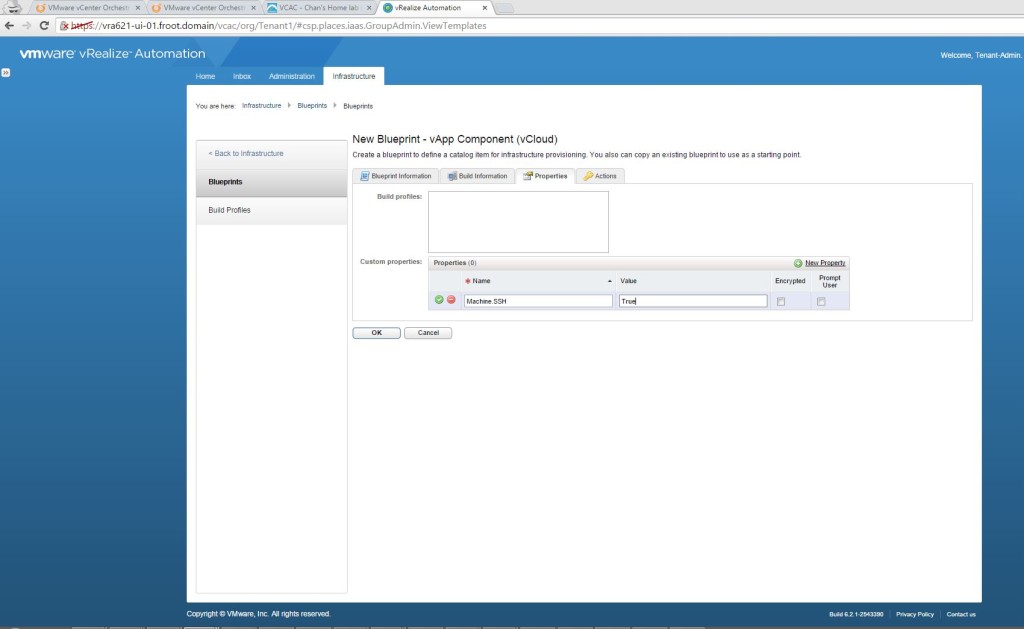
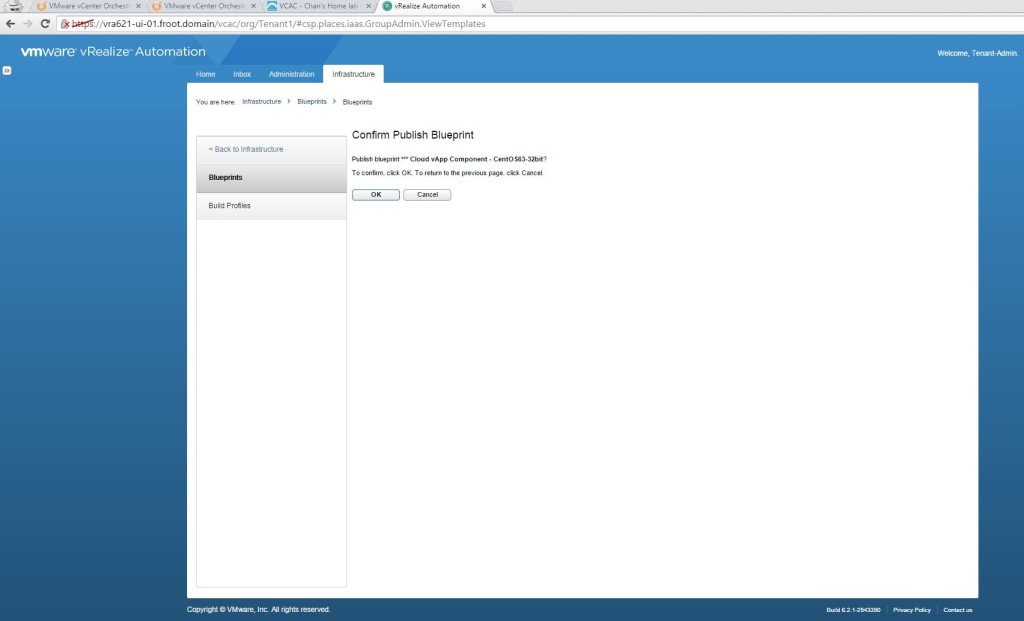
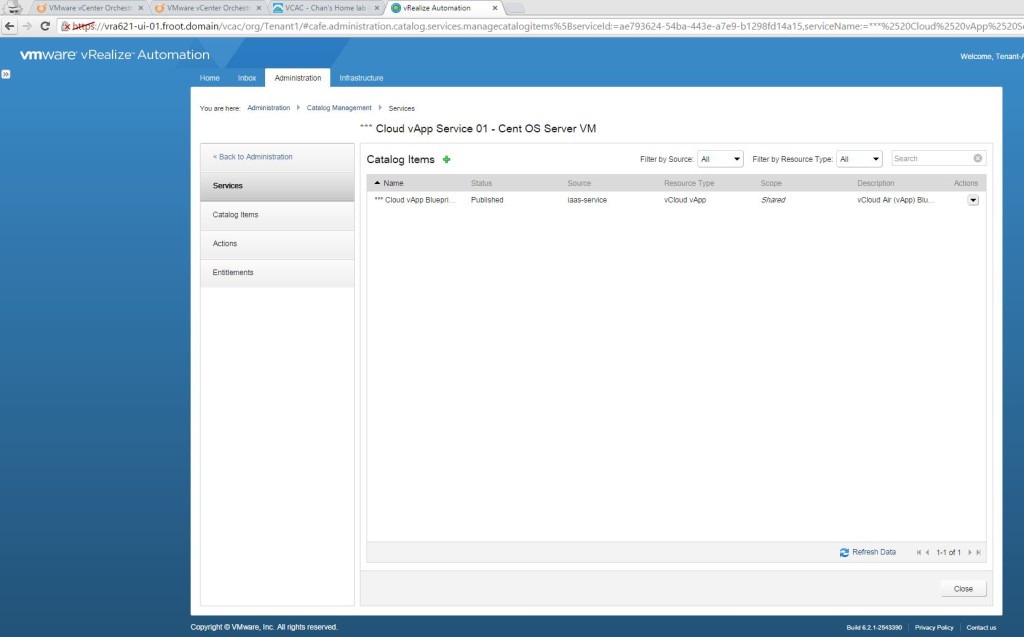
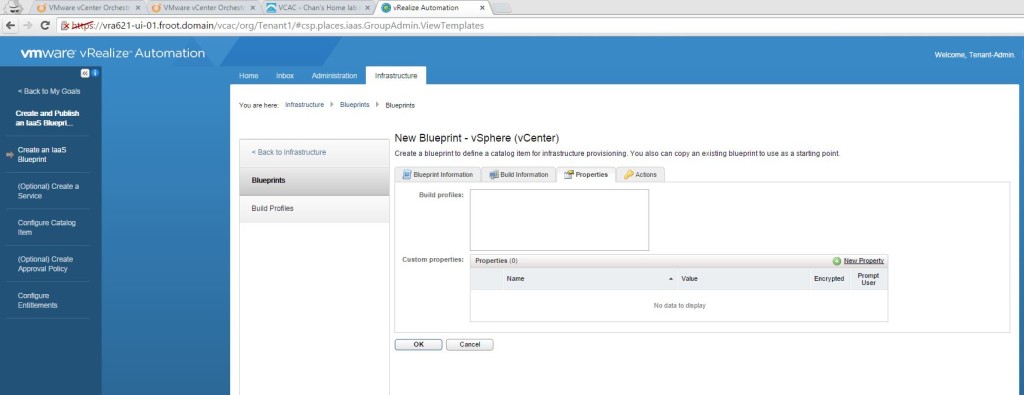
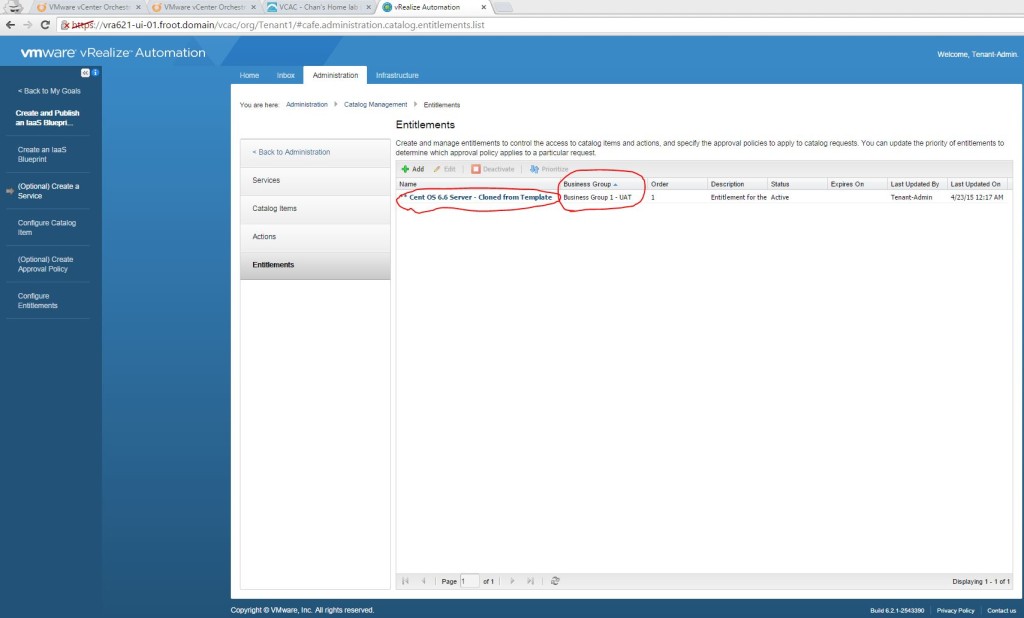
- If you don’t have one, simply login as tenant administrator to the vRA portal and create, publish and entitle a new vSphere VM type blueprint to create one. Given below is a screenshot of the build information for you to get an idea.

- Run the built in vRO workflow “Assign a state change workflow to a blueprint and its virtual machines” found within the “Library->vCloud Automation Center->Infrastructure Administration->Extensibility” folder within vRO
- Start the workflow and select,
- The appropriate vRA workflow stub to enable (What you select here will decide when the vRO workflow will get executed based on the various states of the machine). We are selecting the MachineProvisioned stub as that means the workflow will get executed during the machine provisioned state, after the guest level customizations are completed (i.e. AD account for the machine has been created as a part of the customization).
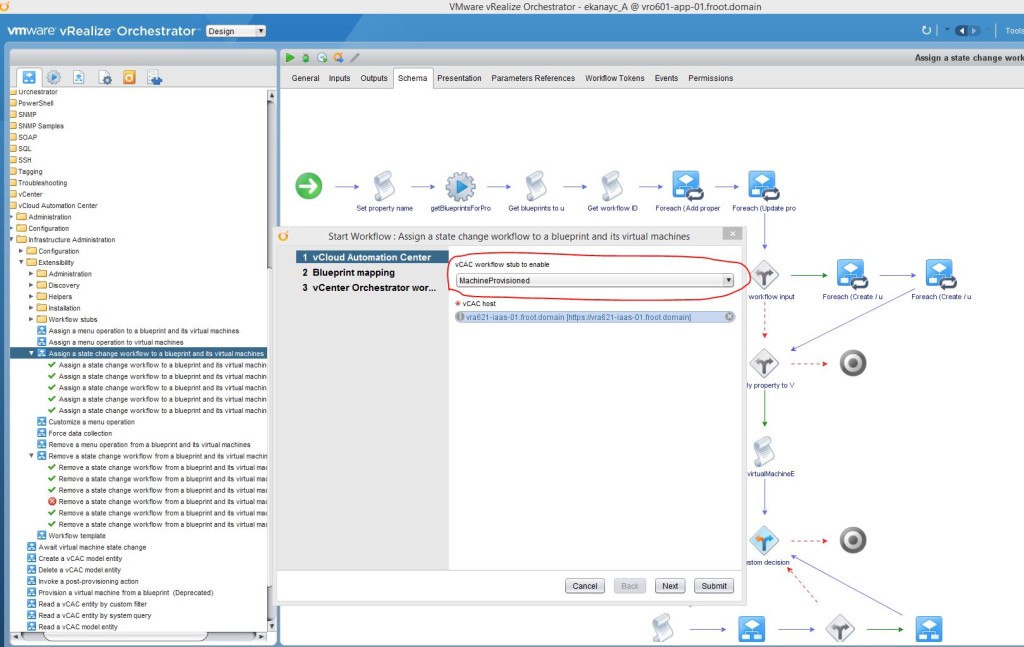
- Also select the vRA host where the blueprint’s are located.

- Click Next
- Now browse to the blueprint you want to bind the vRO workflow & click Next

- Now select the vRO workflow to bind to the blueprint
- Click on the Workflow template link and type the name of the vRO workflow in the filter box
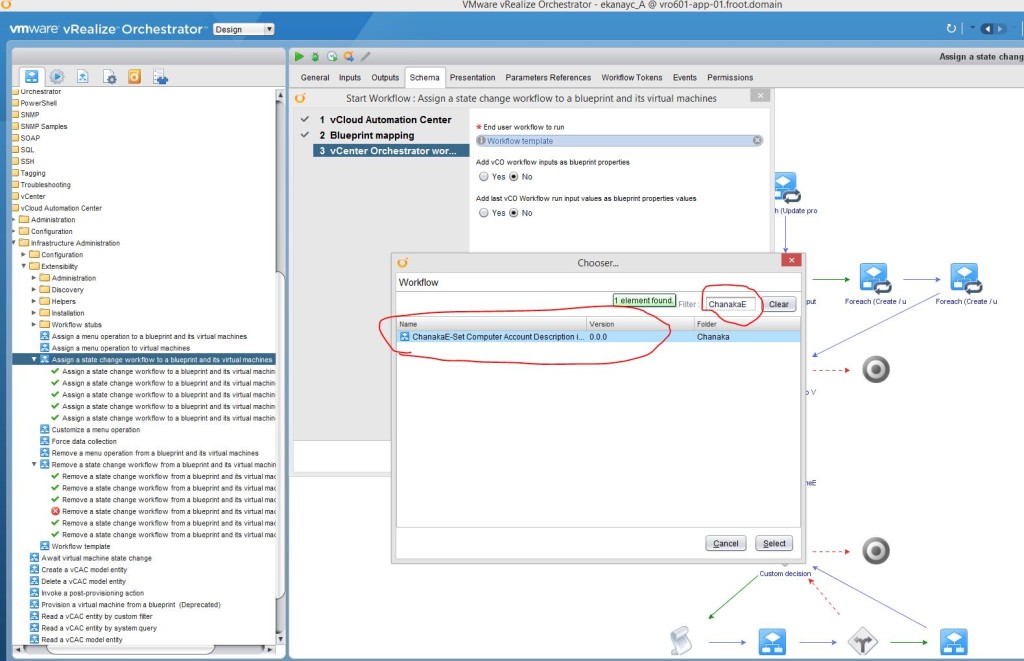
- Select Yes checkbox to the option “Add vCO workflow inputs as a blueprint properties” – This is the step you add the vRO workflows’ input parameters to the blueprint via custom properties.

- Now click submit and ensure its run successfully within the vRO client.

- Verify that its successfully modified the blueprint by navigating to the vRA portal (as the tenant administrator) and looking at the custom properties for the blueprint. Note that you’ll see the following custom properties automatically being added.
- vRO workflow ID for the workflow you’ve bound to the blueprint.

- The 2 input parameters required by the blueprint.
- Set up the AD computer account description on the blueprint properties.
- You can pre-specify the computer account description on the blueprint or force the user provide a description. Im going to use the latter approach.
- Login to the vRA portal as tenant-administrator and go the custom properties page of the blueprint.
- Edit the “ExternalWFStubs.MachineProvisioned.description” property and select the checkbox “Prompt User”.

- Click the green tick to complete and OK to commit the changes to the blueprint.
- That’s it. You’ve now customised the vRA model manager workflow stubs to invoke vRO workflows at various stages of a machine lifecycle and have also used that customisation capability to execute a specific workflow during a machine provisioning from a blueprint.
- Verify the customization by provisioning a machine using the blueprint.
- Lets now verify our customisation is working by provisioning a VM from the blueprint.
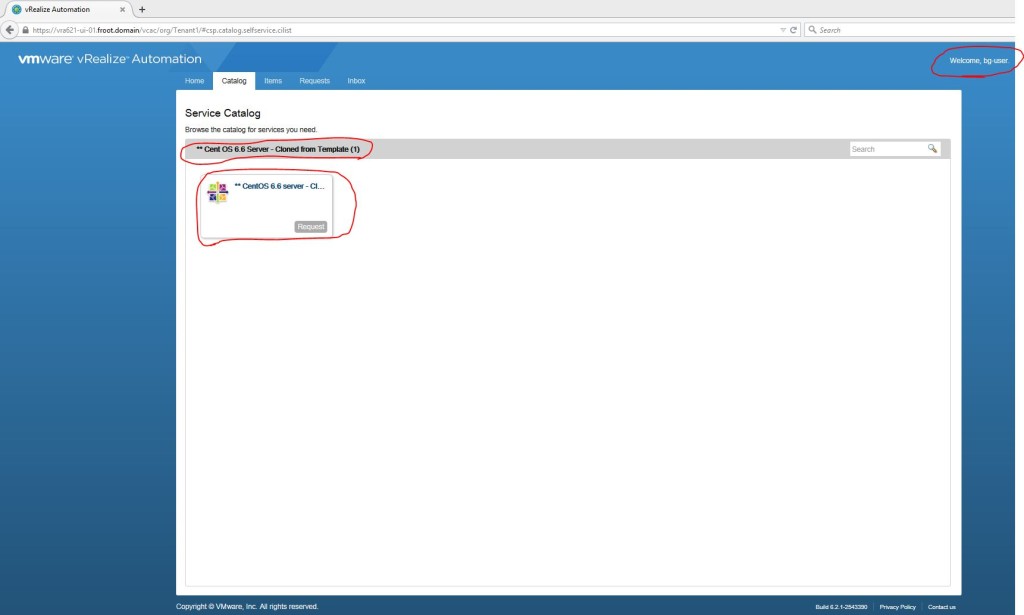
- Login to the vRA portal as a business group user (in this case, its bg-user@froot.domain if you’ve correctly been following all of the vRA deployment articles I’ve published in the correct sequence) who has the correct entitlement to this blueprint.

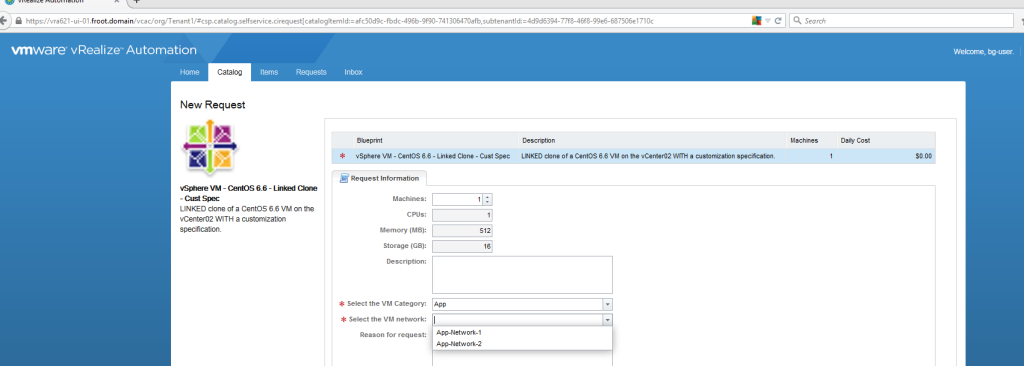
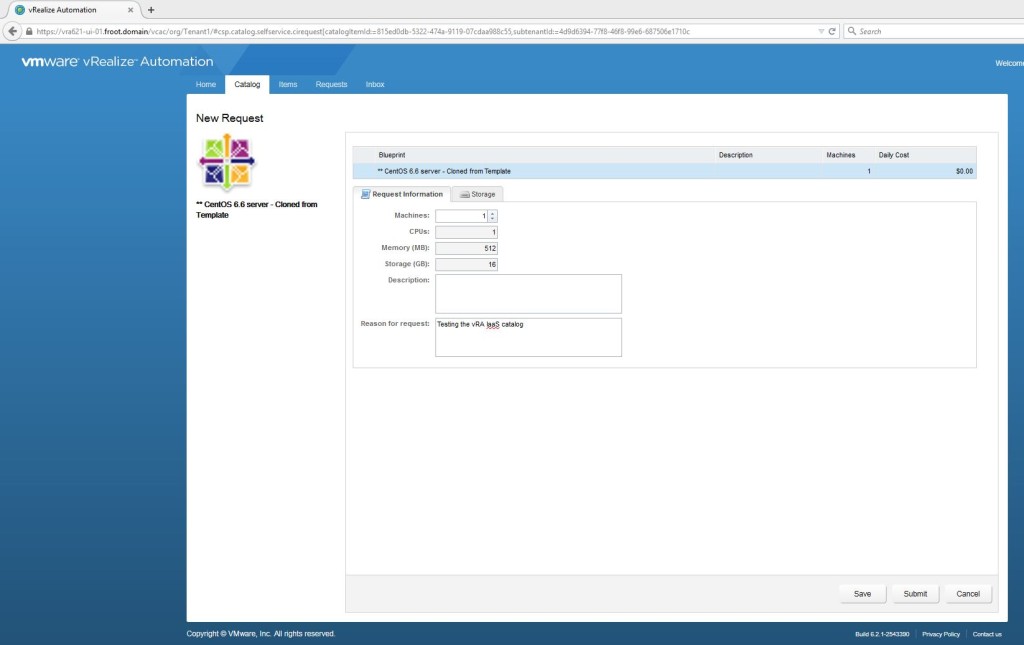
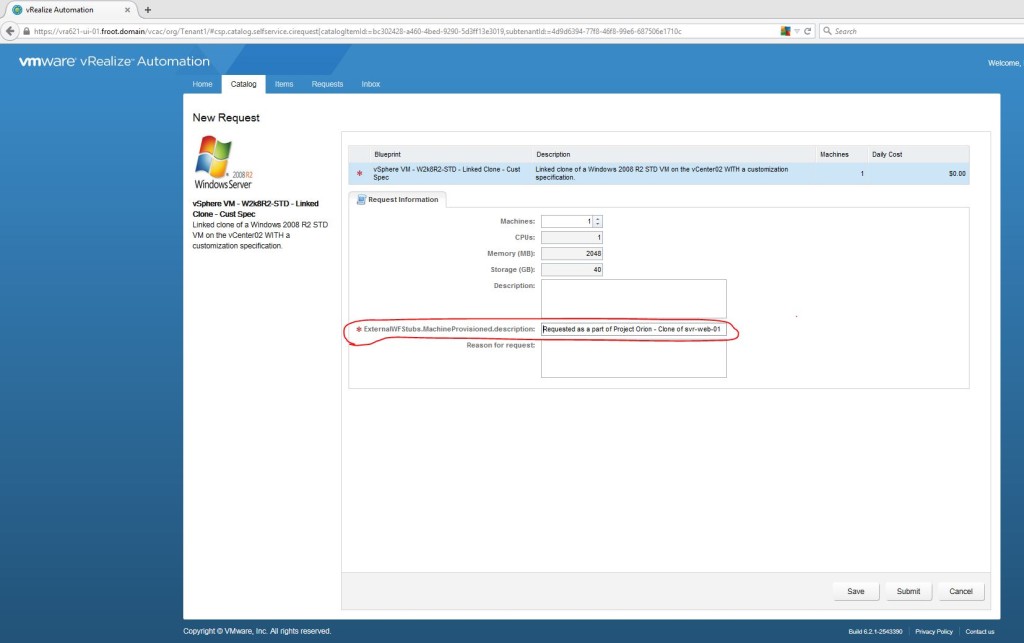
- Request a machine to be provisioned using this blueprint. You’ll note that the computer account description also need to be provided.
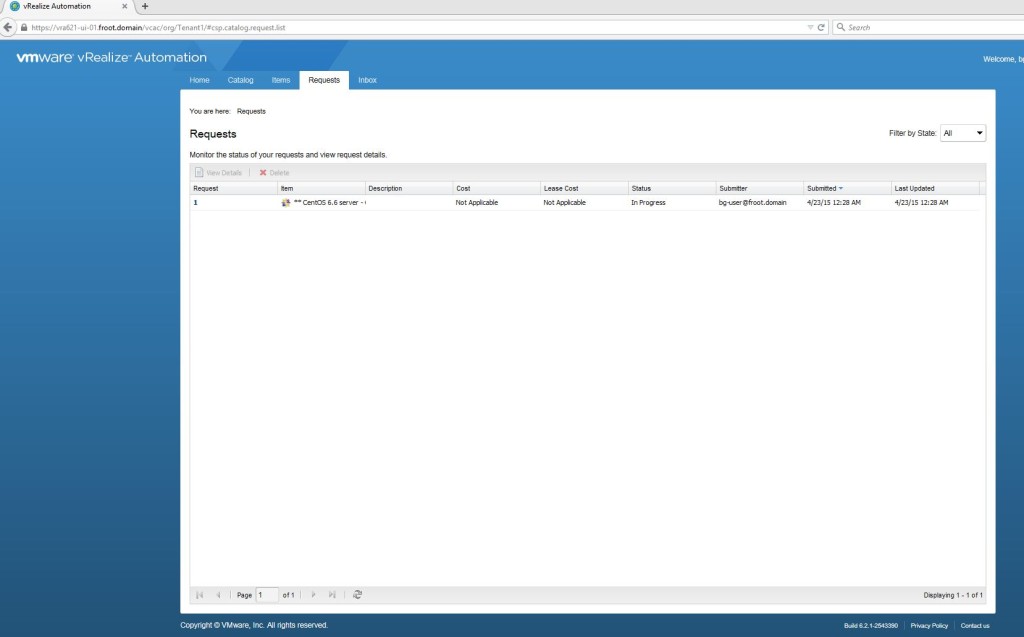
- Wait for the VM to be provisioned and the request to be complete on the vRA portal.
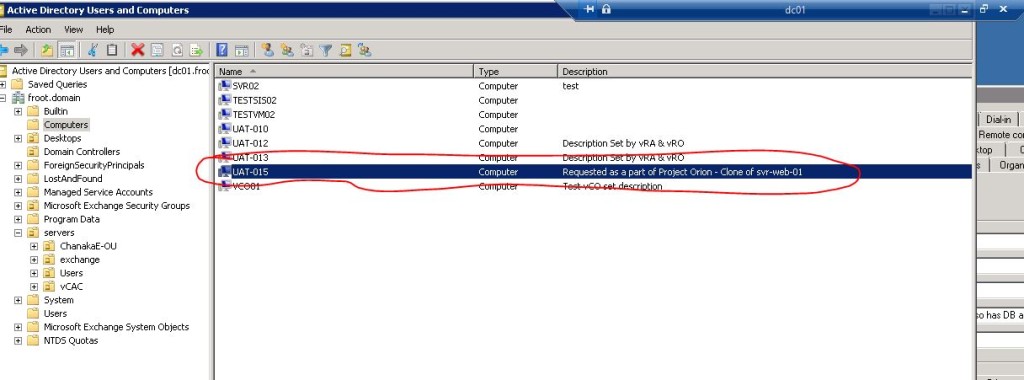
- Once complete, login to the Active Directory and verify that the customised description has been added to computer account.
- You can further verify that the workflow has been run automatically by looking at the execution history for the workflow on the vRO client.
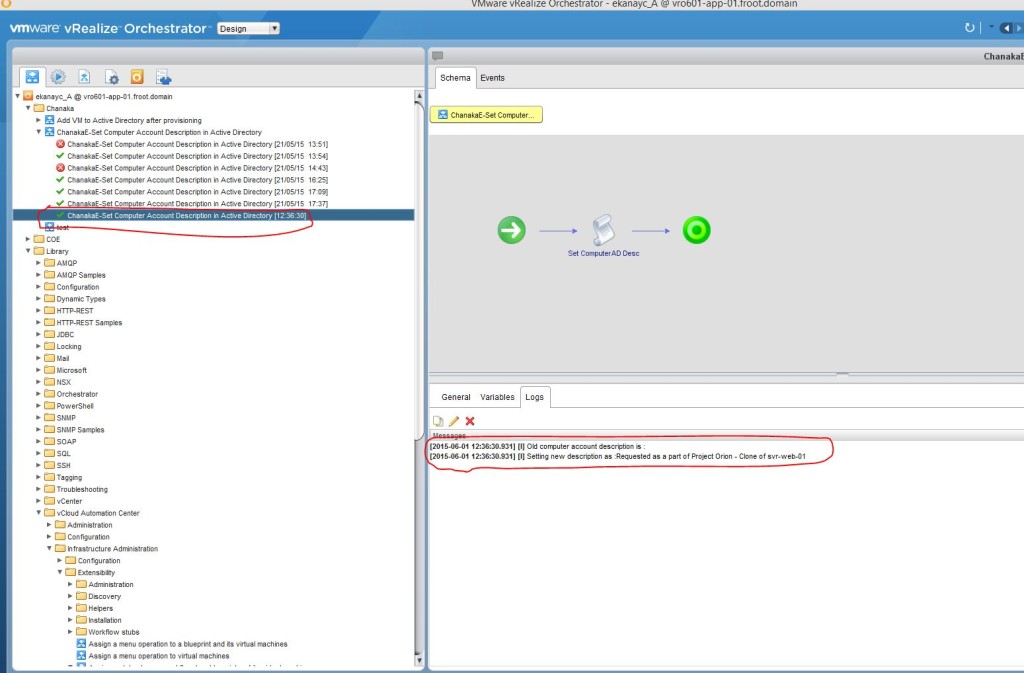
There you have it. A simple customisation of the vRA model manager database logic through the execution of vRO workflows makes the extensibility more fun by allowing us to call various different vRO workflows to be executed during various different lifecycle stages of a machine, through the integration of vRA with vRO.
Hope this was useful…!!
Cheers
Chan


