VMware has released an assessment tool called VIP – VMware Infrastructure Planner which is an appliance that a valid VMware partner can download and deploy at a customer environment in order to assess the suitability of VSAN based on the actual data collected from the infrastructure. This post primarily looks at using this VIP appliance to assess the suitability of VSAN. This assessment is the pre-cursor to a VSAN sizing during which, the sizing data are automatically collected and analysed by VMware and a final recommendations will be made as to the suitability of VSAN and the recommended hardware configuration details be used for building the VSAN. Note that the same appliance can be used to assess the suitability of the vCloud suite components in that environment and I will also publish separate post on how to do that at a later date. The process of using the appliance to do a VSAN assessment involves the following high level steps.
- A VMware employee or a valid channel partner will have access to the VIP portal (https://vip.vmware.com) – Note that the partner would need to sign up to an account free of charge.

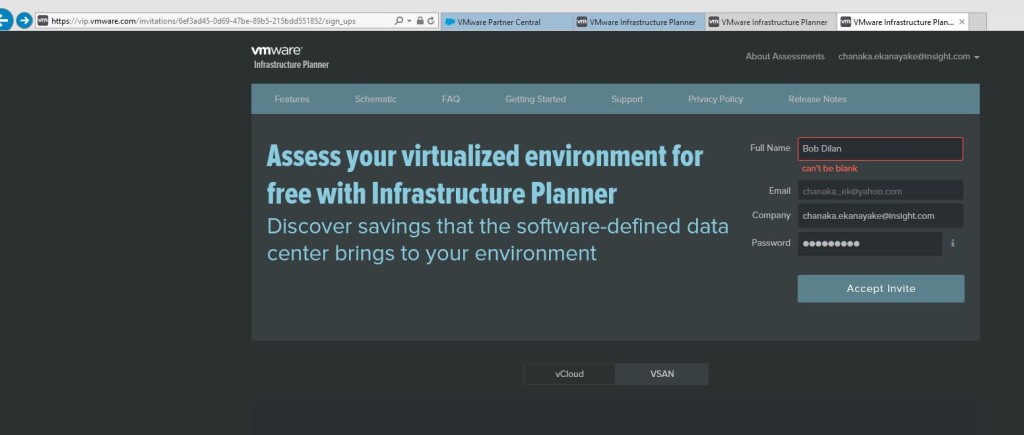
- Once logged in, the partner can create an assessment for a specific customer by providing some basic details (similar to the VMware capacity planner that was heavily used by VMware partners during early virtualisation days to assess virtualisation and consolidation use cases).
- Once the assessment is created, a unique ID for the assessment is generated on the portal.

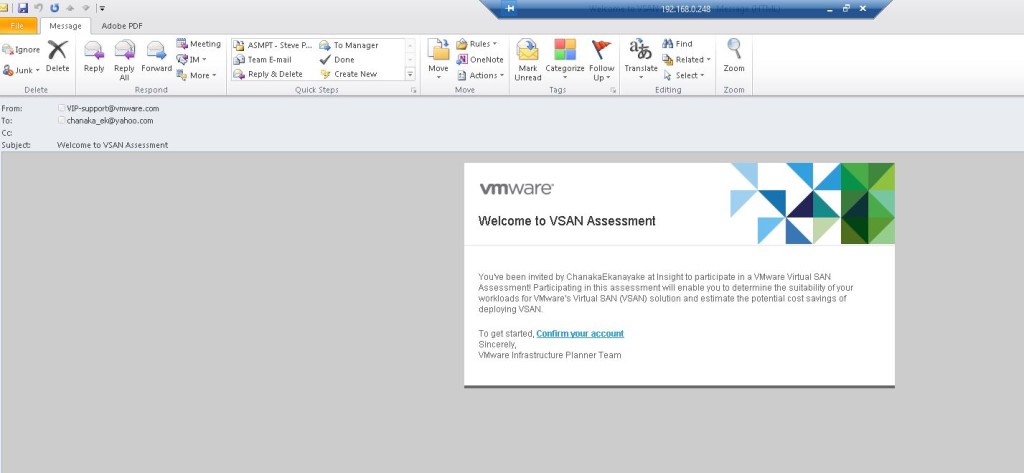
- VMware partner then adds the customer details and the customer gets an email sent with a link to login to the portal and download an .ova appliance (partner can download it also)
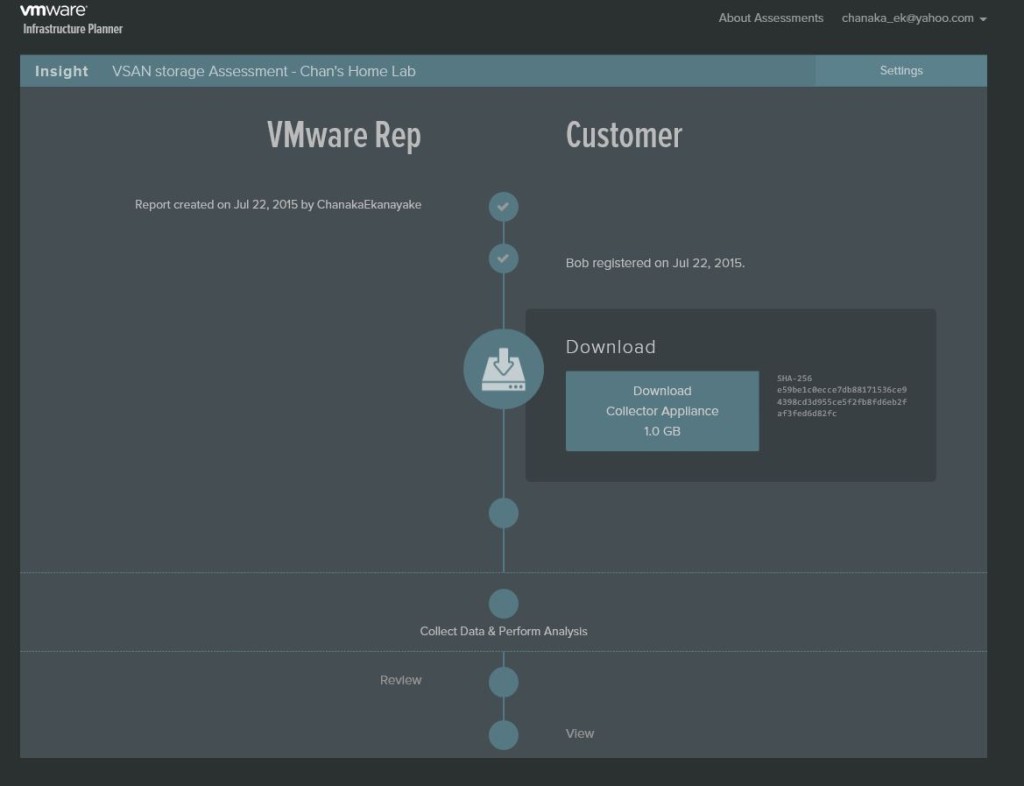
- The customer or the partner then deploys the appliance in the customer’s vSphere cluster (Note that the appliance can be deployed on any vCenter server / Cluster regardless of the one being monitored, as long as the appliance will have the networking access to the cluster being monitored, including the ESXi servers)
- Once the appliance is deployed, you can access the appliance using the https://<IP of the appliance> and do a simple configuration.
- Enter the unique assessment key generated (above). This will tie in the deployed appliance to the assessment ID online so that the monitoring and analysis data will be forwarded on to the online portal under that assessment ID. You get to determine how long the data collection should take place for.
- It then prompts you to select either a VM migration to vCenter assessment or a full cluster migration assessment to vCenter (I’ve used the cluster migration for the below)
- Provide the vCenter address (FQDN) that the collector needs to be registered against to perform the assessment of the VM’s. This could also be the same vCenter that manages the cluster where the appliance deployed or an external vCenter instance. A valid account need to be provided to access the vCenter instance.
- During the vCenter registration process, a VIB file would be deployed to all attached ESXi hosts that will enable the monitoring capability. (no downtime required) – Note the below
- HTTP/S client ports (80,443) need to be open on the ESXi servers to be able to download the VIB.
- According to the deployment notes, ” Histogram analysis and possibly tracefile analysis will be run on these VMs, which will degrade performance by about 5 to 10%, and the hosts will become momentarily unreachable, so be sure not to select VMs that are running very performance sensitive or real-time tasks“
- Once complete, you’ll be presented with a confirmation window similar to the below which lists out all the VM’s in the cluster

- Data collection from the VM’s in the cluster & forwarding on to the online portal will now begin. Once the data collection is complete, an email notification will be sent. Note that all automated email notifications throughout the process will be sent to both the customer’s named contact as well as the VMware partner contact who set the assessment up within the portal. Given below is a screenshot of the portal once the data collection is completed.
- As you can see, its automatically analysed the data and recommended the use of a Hybrid VSAN with 400MB of SSD cache size. (This is based on my lab so the cache size is relatively smaller than what would be recommended in a production environment.


- As you can see, its automatically analysed the data and recommended the use of a Hybrid VSAN with 400MB of SSD cache size. (This is based on my lab so the cache size is relatively smaller than what would be recommended in a production environment.
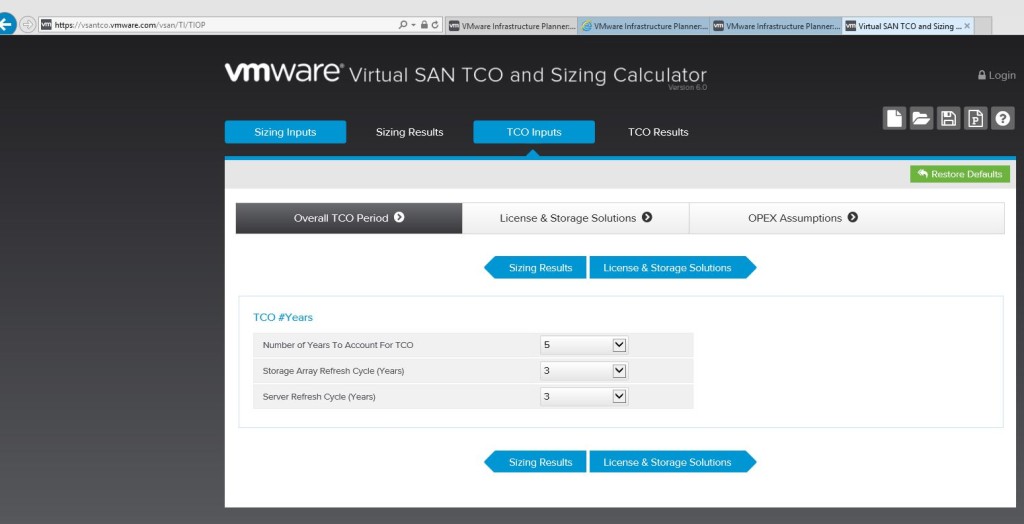
- Once the data collection is complete, data can be directly fed to the VSAN sizer (https://vsantco.vmware.com/vsan/SI/SIEV) to size a potential VSAN solution up which is handy. All you need to do is to click on the button at the bottom that says “Go to VSAN TCO and Sizing Calculator” which will take you to the sizing portal with the data being automatically prefilled for the sizer.


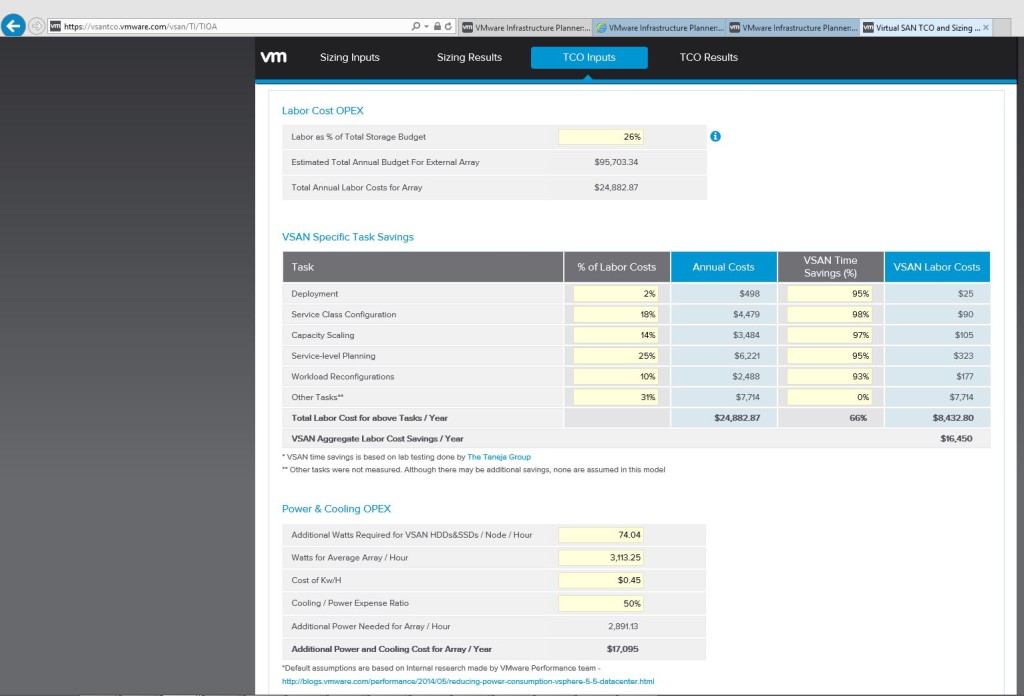
- If you then want to do a TCO comparison to using VSAN Vs traditional HW based SAN, you can go ahead by clicking on the TCO inputs button and providing financial information.

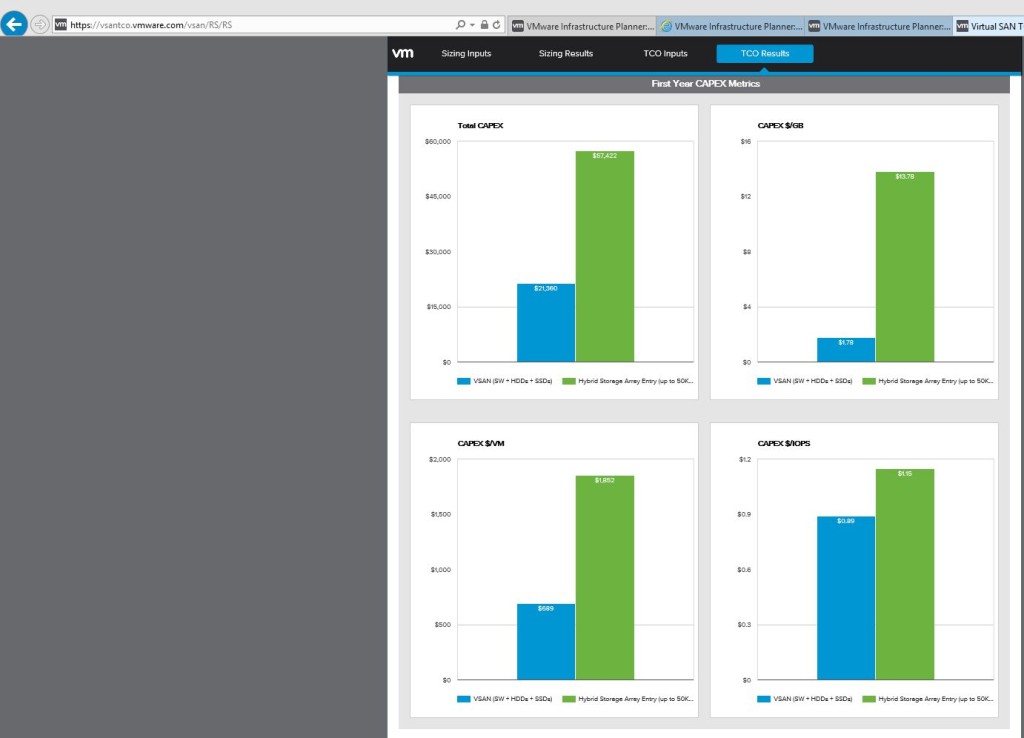
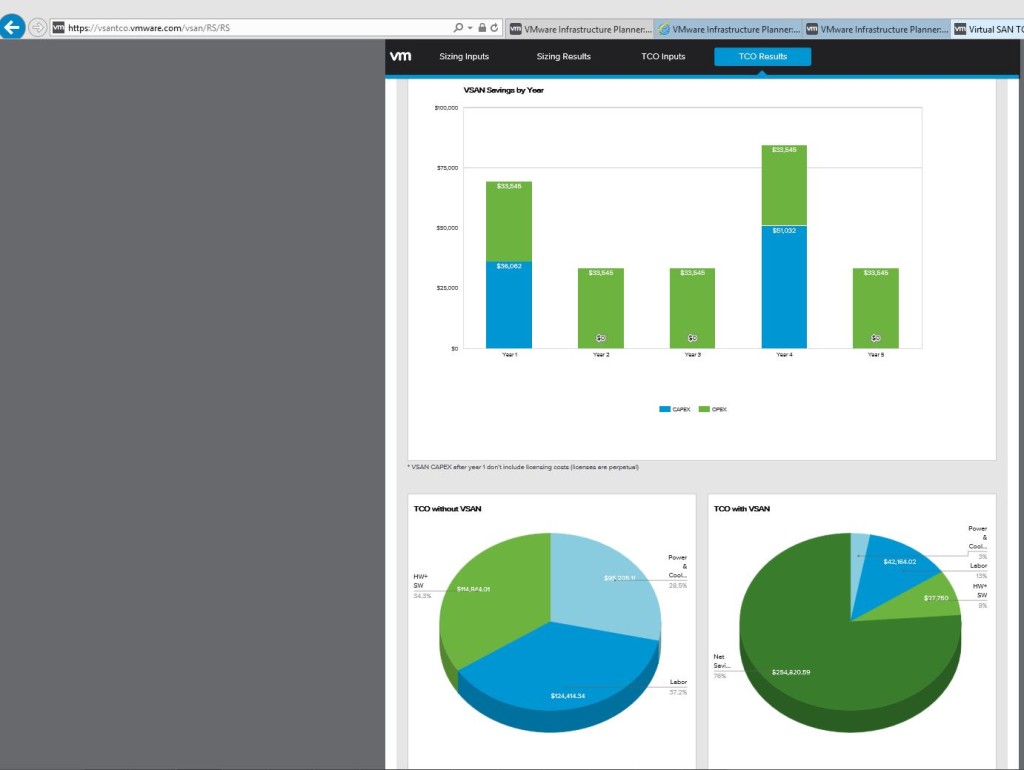
- Sizing calculator then produces a simple TCO report outlining the cost of VSAN Vs traditional SAN (HW based)
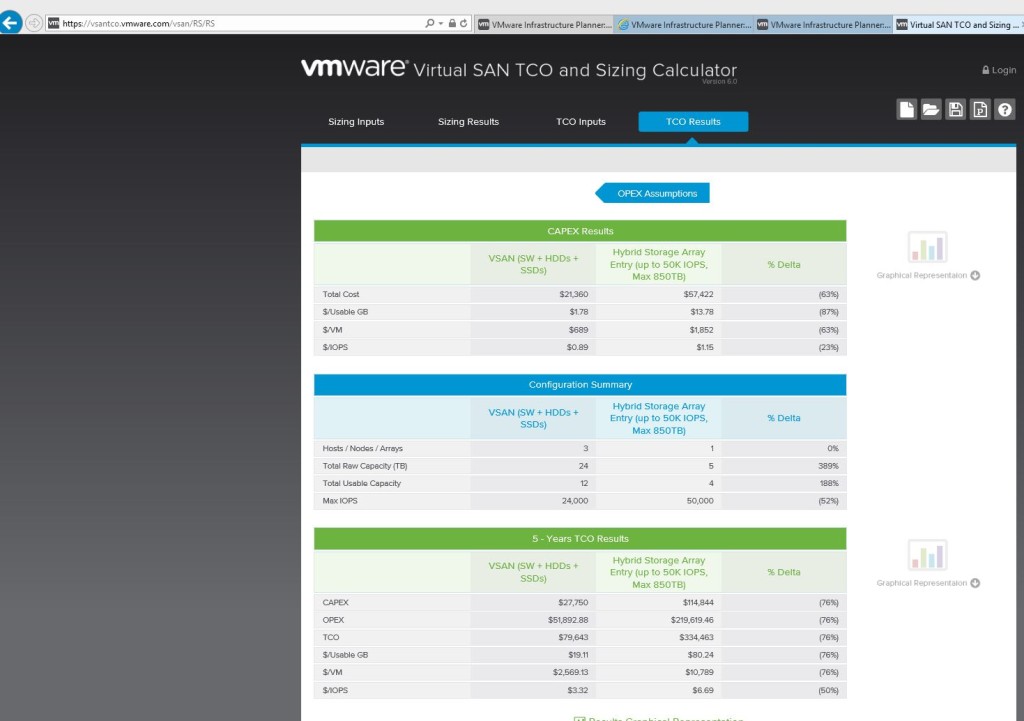

- I should mention that the above screenshots were based on the default TCO assumptions that include default indicative pricing for various HW SAN’s. I’d encourage that you talk to your reseller / storage vendor to have an independent assessment done using their tools and then use the cost they provide for their SAN solution to update the VSAN OPEX assumptions (as shown below) to get an accurate comparison here in these graphs.


Pretty cool ain’t it?
Cheers
Chan