VMware vRealize Automation – (Optional Fix) Missing Catalog / Entitlement Actions on vRA 6.2.x


I came across this weird issue on vRA 6.2.1 where, during the IaaS blueprint creation, most of the actions that should be available (such as “power on”, “Reboot”, “Suspend”…etc.) were not available to be allocated to catalog items (blueprints & services). All of these actions are supposed to be IaaS catalog actions that are available by default once the IaaS components have been deployed, that you can assign to business groups / users when blueprints / catalog items are entitled to users, so that once a vm / server has been provisioned from the said blueprints, those actions are available to the users to interact with the vm / server, through the vRA web portal. If you had this issue, when you login to the vRA portal with tenant administrator privileges, all the actions shown below where the source is listed as IaaS were missing (Everything outside of the highlighted actions below were missing)

Capture

This has always been a known issue with previous versions of vCAC where the recommended fix was to run the following command on the IaaS web server, as an administrator.

C:\Program Files (x86)\VMware\vCAC\Server\Model Manager Data\Cafe\Vcac-Config.exe registercatalogtypes -v

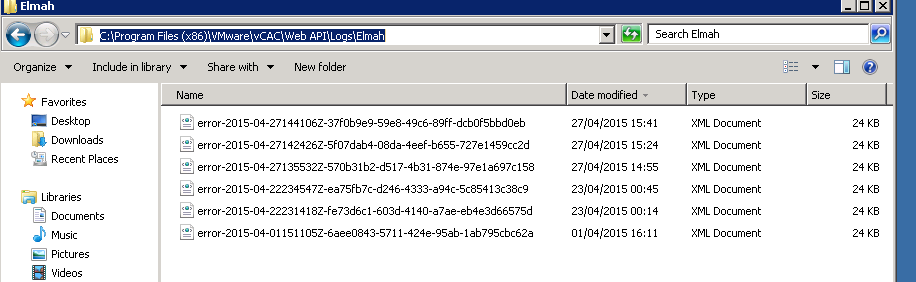
However, with vRA 6.2.x platform (specifically, version 6.2.1), I found that this command alone wouldn’t fix the problem. In my environment, running the above command comes back as succeeded but the actions were still not available. Having raised a VMware support ticket, it turned out that the SAML Token Validation Check (enforced through a configuration line item in C:\Program Files (x86)\VMware\vCAC\Web API\Web.Config file on the IaaS server) is also failing which needs to be fixed as well. If you have the same issue of missing actions in your vRA setup and running the above command doesn’t fix the issue on the vRA 6.2 platform, check the C:\Program Files (x86)\VMware\vCAC\Web API\Logs\Elmah directory on the IaaS server and check if you can see a number of XML files as follows

Elmah XMl

If you see them, open the most recent one up and check for the lines highlighted below

XML content

If this is the case, this is a known issue with regards to the vRA 6.2 platform, internally within VMware and currently there is no specific KB article related to this. From what I found out through VMware support, the issue is caused by vRA sending a signature that is using an algorithm not compatible wit the .Net code on the IaaS server and the error is seen in the Elmah XML file (above), that states “System.Security.Cryptography.CryptographicException: SignatureDescription could not be created for the signature algorithm supplied“.  While a formal fix is likely going to be included in a future release, currently there’s only a workaround available which is to amend the web.Config file to disable SAML Token validation Check. Heres what you need to do.

  1. Go to the IaaS web server as an Administrator and backup the current C:\Program Files (x86)\VMware\vCAC\Web API\Web.Config file (I’d cope & rename this as Web.Config.Backup
  2. Open notepad as Administrator and open the original Web.Config and replace the <!– add key=”DisableSAMLTokenSignatureCheck” value=”false”–> with <add key=”DisableSAMLTokenSignatureCheck” value=”true”/>
  3. Once replaced, the new Web.Config file should be as follows. Web.Conf
  4. Now run iisreset to restart IIS and ensure all the vRA services are started back up correctly
  5. Now (re) run the following command, as an administrator
    1. C:\Program Files (x86)\VMware\vCAC\Server\Model Manager Data\Cafe\Vcac-Config.exe registercatalogtypes -v
  6. You will now see the missing actions being available on the vRA to be assigned to the catalog items.

Hope this was useful

Cheers

Chan

Next: (Optional) vRA Part 8 – Adding a VMware vCloud Air Endpoint & Publishing a Cloud VM Blueprint –>

VMware vRealize Automation Part 7 – Tenant Administrator & Basic Blueprints


Now that we’ve got all the system-wide roles (System / Infrastructure & Fabric Admin) fully configured and each user has done their configuration tasks, next in the to-do-list is the configuration items to be performed by the Tenant Administrator. We wont be looking at everything a Tenant Admin can do here, but only focus on key items relating to blueprints.

First of all, lets briefly look at the Tenant Administrator role (note that the System Administrator assigned the Tenant Administrator role during a previous stage mentioned here)

Tenant Administrator is a key user that is typically a business manager or an IT administrator who is responsible for a tenant who configure vRA according to the needs of the company. He / She is responsible for the followings primarily,

  • Manages and configures the tenant
  • Manages the users and groups (within the tenant)
  • Manages catalog services
  • Creates approval policies & entitlements
  • Manage tenant brandings
  • Manage business groups within the tenant
  • Tracking resource usage by all tenant users
  • Create & manage global (shared) blueprints

Key Tenant Admin tasks

  1. Tenant Configuration Tasks
    1. Configure Identity Stores – This should have already been done at an earlier stage by the System Admin
    2. Configure custom groups
      1. Configure Custom groups (approval Administrator / Release Dashboard user / Release engineer / Release manager & Service architect roles
        and map them to AD users / groups   121
    3. Configure Identity store users such as business group admins, business group users and support users and configure additional privileges to these users (Administration->Users&Groups->Identity Store Users & Groups)
    4. Configure Tenant branding if this is required (Administration->Branding)
    5. Configure notification providers such as email servers to be used within the Tenant for the approval notifications via Administration->Notification->Email servers (I’m not doing this here)
    6. Create Business groups (We’ve already created a business group earlier as Tenant Admin user)
  2. Create & Publish IaaS blueprints
    1. Create an IaaS blueprint
      1. Notes:
        1. We’ll create a simple VM provisioning blueprint here using a CentOS 6.6 template & a customization specification (both need to have been pre-created and be registered in the compute / production cluster vCenter server)
        2. We will be using a basic cloning as the provisioning method (linked cloning and NetApp FlexClone options are also available)
      2. Go to Infrastructure->Blueprints and use new blueprint button to create a new virtual vSphere blueprint and fill out the basic Blueprint information 212
      3. Go to the build information tab and select the appropriate options (as below) 213
        1. You can use custom properties to achieve various functions. A full list of available all custom properties are available here and a list of specific custom properties applicable for a cloning blueprint (similar to what we are creating here) are available here.
        2. Some key, useful custom properties are as follows
          1.  Snapshot.Policy.Limit = <Depth of Snapshot limit. Default is 1, max is 31>
          2. Snapshot.Policy.AgeLimit = <Snapshot age limit in days. Default is no limit>
          3. VirtualMachine.Admin.ThinProvision = True/False (Applicable for VMware & Hyper-V using local or iSCSI storage)
          4. VMware.VirtualCenter.Folder = <Folder to place the VMs within vCenter>
          5. VirtualMachine.Admin.Owner=
          6. VirtualMachine.Admin.AddOwnerToAdmins=True
          7. VirtualMachine.Admin.AllowLogin=True
          8. VirtualMachine.Network0.Address=<IP address for Network 0>
          9. VirtualMachine.NetworkN.MacAddressType=generated/static
          10. VirtualMachine.NetworkN.MacAddress=<MAC Address>
          11. VirtualMachine.NetworkN.Name=<VMNetworkName>
          12. Machine.SSH=True
      4. We will cover the Build profiles and custom properties section separately 214
      5. Select the Actions that would be made available within the Blueprint definition (so they’d be available as entitlement actions to assigned users)   215
      6. Now we have the first basic blueprint definition created successfully.
    2. Publish the IaaS blueprint
      1. Hover the mouse over the created blueprint and select publish & click Ok to confirm. 221
    3. Create a service
      1. In order for a published blueprint to be made available on a catalog to the users, a service need to be created and the blueprint must be associated with that service
      2. Go to Administration->Catalog management -> Services and add a new service, populate the information required and add.   232
      3. Associate the blueprint with the service by selecting the service created and click on “manage catalog items” 233
      4. Add a catalog item and select the previously created blueprint 234
    4. You can create approval policies if required next(Administration->Approval Policies). I’m opting to not create approval policies and instead opt for no approvals.
    5. Create Entitlements
      1. Once a blueprint is created, and has been associated within a service, it (the service) need to be given entitlements. In other words, the service needs to be mapped to a user / group to be given access so that they can request a VM to be provisioned from this service / blueprint.
      2. Go to Administration->Catalog management->Entitlements and add a new entitlement. Provide a name for the entitlement (note: To avoid confusion, if the relationship between a blueprint:service:entilement is a 1:1:1, I keep the name identical for all 3 to keep thins simple and related) and select the AD groups / users that this blueprint / service is made available for within the online catalog. Click next 252
      3. Add the entitled services (created above), Catalog item (blueprint created above) and the appropriate entitled actions.
        1. Note: if the VM actions are not fully populated within the entitlements section, on the IaaS server host, navigate to “C:\Program Files (x86)\VMware\vCAC\Server\Model Manager Data\Café” folder from command line and run “Vcac-Config.exe” registercatalogtypes –v”253
      4. Once added, the entitlements are complete 254
  3. User request through the catalog
    1. All tasks required to make the blueprint listed on an IaaS catalog are now complete and the entitled users can now request a machine provisioning based on this blueprint through the portal
    2. Login to the vRA portal (URL “https://<FQDN of the vRA Appliance>/shell-ui-app” if using the default tenant) using the appropriate business group user (bg-user in our example based on the entitlements we set above) and you’ll see the CentOS 6.6 server is now available in the users catalog.    32
    3. Request a VM to be provisioned off of this catalog item.    33
    4. All submitted requests can be tracked within the requests tab. 34
    5. You can see the cloning task initiated by the vRA service account within vSphere client / web client. Note that there may be a slight delay before this is executed on the vCenter after being submitted via vRA. Note that the default custom properties set for the business group (explained in the previous post of this series) dictated where the VM is created within the vCenter folder hierarchy & the name of the VM is automatically based on the default machine prefix attached to the business group (also created earlier) 35
    6. Once successfully created, the item will appear under the “Items” tab within the vRA IaaS portal for the user to access based on the entitled actions previously defined.   36

That’s basically it. This effectively now concludes the basic deployment tasks I’ve intended to cover as the typical deployment & configuration tasks you’d have to do in the field to deploy vRA 6.2.1 along with vRO 6.0.1 and NSX 6.1.x all fully integrated for extensibility. Hopefully this series of posts gave you a summarized view of all the initial tasks that you’d need to do, in the exact order they need to be done, including any undocumented little quarks I’ve come across that potentially could have cost you some troubleshooting time in the field. Hope this was of use to some. I know I will refer back to this in the future for my own benefit.

I would appreciate any feedback

Cheers

Chan


P.S. While this post concludes the series of posts formally, I will continue to provide additional vRA articles for further extensibility where we will look at more extensibility options to leverage vCO workflows during the provisioning stage to achieve various results and creating custom actions, advanced service blueprints, using vRA for publishing non IaaS functions such as AD password resets…etc. However they are not really mandatory for a typical vRA deployment and would only be required depending on the end user’s needs.


Next: (Optional Fix) Missing Catalog / Entitlement Actions on vRA 6.2.x –>